How To Make Paper Look Old With Coffee – Easy DIY Guide
To make paper look old with coffee, mix 2 teaspoons of instant coffee with ¼ cup hot water until smooth. Apply the coffee using a paintbrush or paper towel and soak the paper for 2-3 minutes for a richer color.
Let it air dry or bake at 200°F for 2 minutes, watching closely. Seal your aged paper with a clear spray to preserve it. Keep going, and you’ll discover tricks to nail the perfect vintage look and avoid common mishaps.
What You Need to Age Paper With Coffee
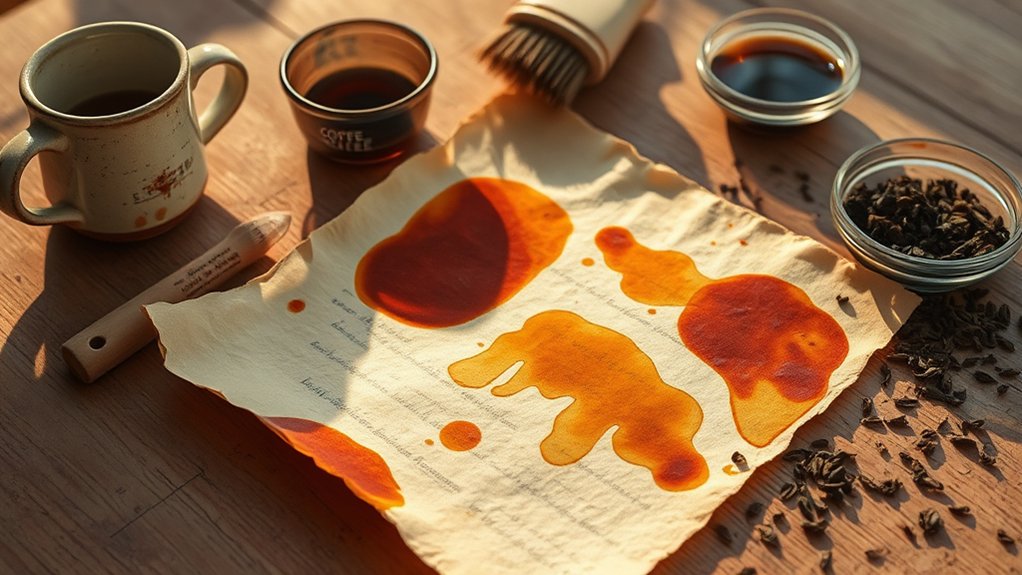
To get started with aging your paper using coffee, you’ll need a simple mix of 2 teaspoons of instant coffee dissolved in ¼ cup of hot water. That’s your magic staining potion.
This DIY guide makes aging paper easy and fun, using just a few basic items.
A simple, enjoyable way to give your paper a vintage look with everyday materials.
Grab a paintbrush or a paper towel to spread the coffee evenly over your paper’s surface. If you want a deeper, richer look, you can soak your paper in the coffee mix for 2-3 minutes.
After applying coffee, drying is essential. Air dry for a few hours or pop it in the oven at 200°F for a couple of minutes, but keep a close eye to avoid burning.
Finally, sealing the paper helps preserve that aged look for your project’s long haul.
How to Prepare Coffee for Paper Aging
To get that perfect aged look, start by mixing your coffee just right. Usually, 2 teaspoons of instant coffee in a quarter cup of hot water works well.
But if you want something stronger, brewed coffee can really pack a punch.
Just make sure your mixture is smooth and clump-free—that way, you’ll avoid blotchy spots on your paper.
When it’s ready, you’ve got options. You can brush it on for light stains, or soak the paper if you’re after a richer, deeper color.
Feel free to experiment and see what suits your style best!
Coffee Concentration Ratios
Although you might think any coffee will do, getting the concentration just right is key to making your paper look authentically aged.
Start by mixing 2 teaspoons of instant coffee with ¼ cup of hot water. That’s your standard dilution for a nice, subtle stain.
Want a stronger, richer effect? Bump it up to 3 teaspoons per ¼ cup.
If you’re using brewed coffee instead of instant, let it cool first to avoid damaging the paper.
Remember, soaking your paper in this coffee solution for 2-3 minutes gives a deeper color than just brushing it on.
Whether you’re sipping coffee or tea from your favorite coffee mugs, adjusting these ratios lets you control how dark and vintage your paper turns out.
Mixing Coffee Solution
When you’re ready to give your paper that perfect vintage look, start by mixing 2 teaspoons of instant coffee with ¼ cup of hot water. Make sure the water’s hot enough to dissolve every bit of coffee for a smooth, even stain.
Use instant granules for quick dissolving, which helps avoid clumps that cause uneven patches. Different coffee types can affect the tone, but instant coffee is your best bet for consistency. Stir thoroughly until the mixture is uniform.
If you want lighter stain variations, just tweak the ratio. Less coffee or more water will give you softer hues.
Always test your solution on a scrap piece first. It’s the easiest way to nail the exact shade you want before applying it to your main project.
Application Techniques
Grab your paintbrush or a paper towel and get ready to bring that vintage vibe to your paper with the coffee mixture you prepared. To nail those brush techniques, make sure your coffee is well-mixed and smooth, no granules! This helps you get even coverage without blotches.
For cool color variations, try soaking the paper for 2-3 minutes before drying. It darkens the tone and adds depth. Don’t forget texture effects: dabbing with a crumpled paper towel creates natural stains and wrinkles, boosting authenticity.
Here’s a quick rundown:
- Use a paintbrush for controlled strokes or a towel for blotchy, rustic looks.
- Soak for richer, deeper hues.
- Dry naturally or bake at 200°F for 2 minutes to lock in that aged charm.
Simple, right? Your paper’s about to look beautifully old!
Applying Coffee Stains: A Simple Guide
A simple way to give your paper that vintage vibe is by applying coffee stains with a paintbrush or paper towel.
Start by mixing 2 teaspoons of instant coffee in ¼ cup of hot water to create your staining solution.
Use gentle sweeping or dabbing motions to spread the coffee evenly, experimenting with coffee stain techniques to get varied aged paper textures. This hands-on approach lets you explore creative coffee applications, adding character and authenticity.
After applying, let the paper air dry for a couple of hours or speed things up by baking it at 200 degrees for 2 minutes.
Soaking Paper for a Deeper Coffee Color
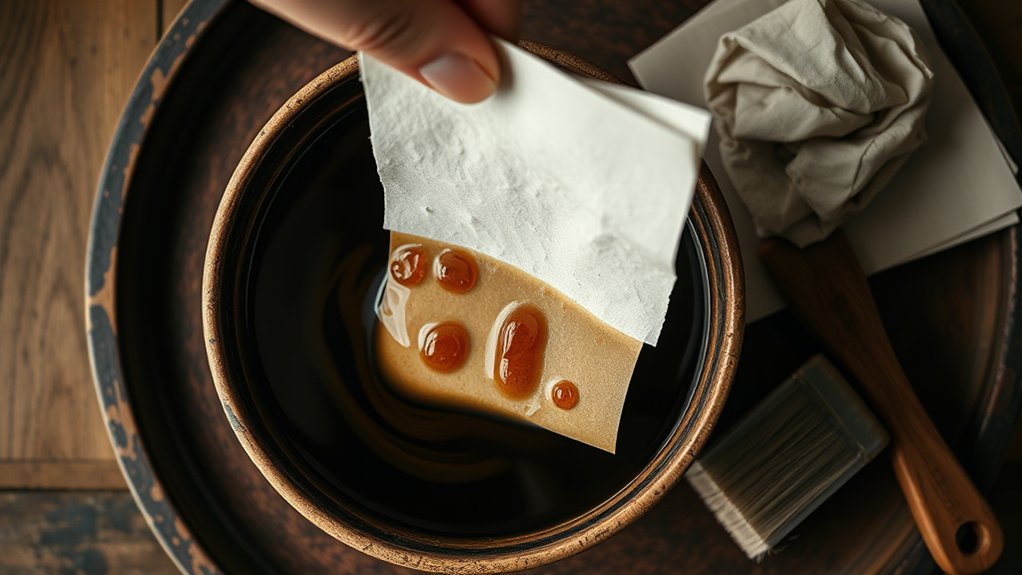
If you want your paper to have a richer, more intense coffee hue, soaking it in a well-mixed coffee solution is the way to go. To boost coffee color intensity and bring out interesting paper texture effects, try this simple method.
First, mix 2 teaspoons of instant coffee into ¼ cup of hot water until fully dissolved. Then, immerse thicker paper in the solution for 2-3 minutes. This soaking time variation lets you control the depth of color.
Here’s what to keep in mind:
- Use thicker paper for better absorption and a more authentic aged look.
- Stir the coffee well to avoid uneven coloring.
- Carefully lift the paper after soaking and let excess drip off before drying.
This technique guarantees a deeper, more uniform coffee stain every time!
Drying Methods for Coffee-Aged Paper
Once you’ve soaked your paper in coffee, drying it properly is key to locking in that rich, vintage look without damaging the fibers.
Air drying is a popular drying technique; just lay your paper flat on a clean surface to maintain its shape and avoid curling. Depending on humidity effects and paper thickness, this can take 2-3 hours.
If you’re in a hurry, pop your paper in the oven at 200°F for about 2 minutes. Watch it closely to prevent burning.
Avoiding Paper Damage When Aging With Coffee
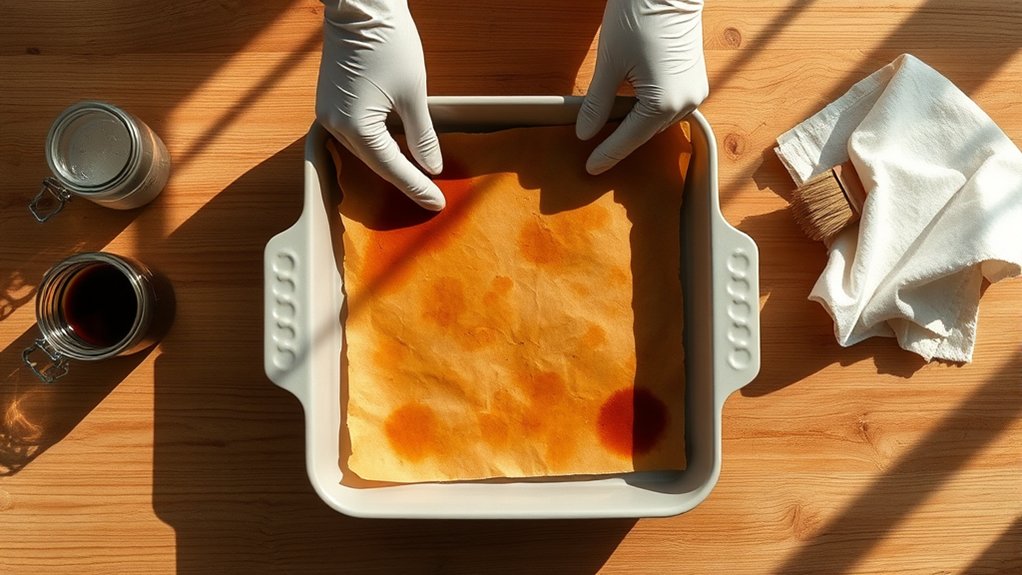
You’ll want to keep your coffee nice and diluted so it doesn’t soak the paper too much.
Too much liquid can cause warping or even tearing. Just keep an eye on how long you leave the paper in the coffee—usually, a couple of minutes is enough to get that aged look without weakening the fibers.
And when it comes to drying, try to control the temperature. Keeping it gentle and steady helps prevent curling or any other damage.
Preventing Paper Over-Soaking
Three minutes is all you should let your paper soak in coffee to avoid turning your vintage look into a soggy mess. Keeping the soaking duration short is key to preserving paper integrity and preventing tears or warping. You want that aged vibe, not a mushy disaster!
Here’s how to nail moisture control:
- Use a diluted coffee mix, about 2 teaspoons of instant coffee in ¼ cup hot water, to avoid saturating the paper.
- Keep a close eye on your paper while it’s soaking and pull it out as soon as the color looks right.
- For extra control, try applying coffee with a paintbrush or paper towel instead of full immersion.
After soaking, air dry or bake your paper immediately to lock in the look without weakening the fibers.
Controlling Coffee Concentration
Although it’s tempting to dive right in with a strong coffee brew, controlling the concentration is key to getting that perfect aged look without damaging your paper.
Start with 2 teaspoons of instant coffee mixed in ¼ cup hot water for a balanced tone that respects paper texture variations.
Test the solution on scrap paper first to see how different coffee flavor profiles translate into color strength. If you want a lighter effect, dilute the coffee further. This prevents warping or tearing.
Using a brush instead of soaking gives you more control over application, letting you adjust aging time precisely.
If soaking, limit it to 2-3 minutes to avoid weakening fibers. This careful control keeps your project looking authentically aged yet sturdy.
Monitoring Drying Temperature
When drying your coffee-aged paper, keeping a close eye on temperature is essential to avoid ruining all your hard work.
Using smart temperature control techniques will help you prevent heat damage while preserving that vintage look. Whether you bake or air dry, understanding drying time effects is key.
Here’s how to nail it:
- Set your oven to 200°F and place the paper on a flat baking sheet. Never put it directly on the heating element.
- Check your paper frequently during baking; even a minute too long can cause brittleness or discoloration.
- If air drying, expect 2-3 hours for gradual moisture evaporation, which helps reduce damage risks.
How to Seal and Preserve Coffee-Aged Paper
One simple way to protect your coffee-aged paper from moisture and fading is to use a clear acrylic spray sealant. This easy sealing technique offers solid moisture protection, helping your vintage-look paper last longer.
Protect coffee-aged paper from moisture and fading with clear acrylic spray sealant for lasting vintage charm.
Spray in a well-ventilated area, holding the can about 12 inches away for smooth, even coverage.
Before spraying your masterpiece, test the sealant on a small scrap to make sure it won’t change the color or texture. For extra durability and a subtle shine, add a layer of archival-quality Mod Podge on top.
Remember these paper preservation tips: once sealed, store your paper in a cool, dark spot to keep its aged charm intact and prevent deterioration.
Sealing your coffee-aged paper is a small step with big impact!
Creative Crafts Using Coffee-Aged Paper
You can totally transform your coffee-aged paper into charming vintage cards that make every message feel super special.
It’s also perfect for scrapbooking—adding that timeless vibe to your favorite photos and keepsakes.
Plus, using it as a background in art journals gives your sketches and notes a warm, creative touch you’ll really love.
Vintage Card Making
Ever wondered how to give your handmade cards that perfectly worn, vintage vibe? Start by soaking your paper in a mix of 2 teaspoons instant coffee diluted in ¼ cup hot water. This gives your card that rich, warm hue essential for vintage aesthetics.
Next, add card embellishments like stamps or hand-drawn designs to boost that old-school charm. Don’t be afraid to play with different coffee strengths or brush techniques to create texture variations. This makes each card uniquely rustic.
Finally, seal your masterpiece with a protective spray to lock in the look and keep your vintage cards lasting longer.
Here’s a quick rundown:
- Soak or brush paper with coffee for color depth.
- Add stamps or drawings for authentic card embellishments.
- Experiment with textures using varied coffee applications.
Scrapbook Decoration Ideas
Although scrapbooking is already a creative outlet, adding coffee-aged paper takes your layouts to a whole new level by infusing them with a warm, vintage vibe. Use coffee-stained paper as backgrounds to create unique textures that make your photos and scrapbook embellishments pop.
You can also cut tags, journaling spots, or pockets from coffee-aged paper and layer them using smart layering techniques to add depth and interest.
Pair these with vintage themes by stamping or stenciling delicate designs onto the aged paper for a charming, intricate look.
Don’t forget to seal your creations with Mod Podge or a clear spray to keep that rich coffee tone from fading, ensuring your scrapbook pages stay beautiful and timeless for years to come.
Personalized Art Journals
When you start using coffee-aged paper in your art journal, you immediately add a warm, vintage touch that brings your pages to life.
This technique sparks artistic inspiration and lets you explore unique journal themes with a nostalgic vibe.
To make your personalized art journals even more enchanting, try these tips:
- Play with different coffee strengths to create various shades of brown, giving each page a distinct look.
- Use texture layering by combining coffee-stained paper with fabric or lace, adding depth and tactile interest.
- Write your favorite quotes or poetry on the coffee-aged paper, then seal with a spray fixative to preserve that charming aged effect.
This approach transforms your journal into a creative keepsake filled with personality and history.
Troubleshooting Common Problems With Coffee Aging
If your paper ends up looking too dark or uneven after applying coffee, don’t worry. You can fix it by adjusting your technique. Dilute your coffee more for lighter shades and apply it in smaller sections to avoid blotches.
Using a paintbrush lets you control the layers better with these coffee aging techniques. If your paper gets brittle, reduce baking time or lower the heat to keep it flexible. A shiny finish? Just add a matte sealant to maintain that aged look without the gloss.
Here are some common troubleshooting tips to help with paper preservation methods:
| Problem | Quick Fix |
|---|---|
| Too dark | Dilute coffee with more water |
| Uneven staining | Apply in small sections, blend |
| Brittle paper | Lower baking temp or time |
Coffee vs. Tea: Which Paper Aging Method Works Best?
Wondering whether coffee or tea makes your paper look more authentically aged? Both brewing techniques offer unique effects depending on your aesthetic preferences and paper types.
Coffee gives you a richer, darker tone by soaking the paper for 2-3 minutes, perfect for a pronounced vintage vibe. Tea, on the other hand, produces a lighter, golden tint with dabbing techniques that add texture and subtlety.
Here’s a quick breakdown:
- Coffee’s uniform soak suits thicker paper types needing bold aging.
- Tea’s dabbing works best on thinner paper for varied intensity.
- Both dry well either air-dried (2-3 hours) or baked quickly (200°F for 2 minutes).
Pick coffee for drama, tea for softness. Your project defines the best method!
Frequently Asked Questions
Can I Use Coffee Grounds Instead of Instant Coffee for Aging Paper?
Yes, you can totally use coffee grounds instead of instant coffee for aging techniques.
Coffee grounds give your paper a cool, textured look, unlike the smoother finish from instant coffee.
Just brew strong coffee, brush on the grounds, and watch your paper develop rich, darker stains.
It’s a fun coffee alternative that adds unique paper textures, making your DIY projects stand out with a rustic, vintage vibe.
Just remember to rinse gently to avoid clumps!
How Long Does Coffee-Aged Paper Last Without Fading?
Coffee-aged paper can last a few decades without significant fading if you control fading factors like sunlight and humidity.
The aging effects from coffee’s acidity might wear the paper down over time, so you’ll want to use preservation techniques like sealing it with archival spray and storing it in a cool, dark place.
If you handle it gently and avoid exposure, you’ll keep that vintage look vibrant for years to come!
Is It Safe to Use Coffee Aging on Photos or Printed Documents?
You shouldn’t use coffee staining methods on photos or printed documents if you care about photo preservation techniques.
Coffee’s moisture and acidity can make inks run or smear, ruining your prints.
Instead, try paper aging alternatives like tea staining on blank paper or using digital filters.
If you really want that aged look, test a tiny spot first and seal the paper afterward to protect it from damage and fading.
Can I Reuse the Coffee Solution for Multiple Sheets of Paper?
Imagine you’re aging invitations for a vintage party. You can totally reuse the coffee solution for multiple sheets of paper!
Just keep an eye on the coffee solution’s color and strength. If it gets too light, add more coffee to maintain the perfect paper texture.
Using this trick not only saves you time but also keeps your aging techniques consistent.
What Types of Paper Work Best for Coffee Aging?
You’ll get the best aging effects using heavier vintage paper like cardstock or watercolor paper. They soak up coffee better and create richer tones.
Textured or handmade papers add cool depth with coffee techniques, making your project pop.
Brown kraft paper’s natural color works great too, giving that warm, rustic vibe.
Just steer clear of glossy or coated papers since they resist the coffee and ruin the effect.
Experiment to find your fave!
Conclusion
Aging paper with coffee is like painting with time, adding character and charm to your creations. By following these simple steps, you’ll transform plain sheets into vintage treasures that tell their own story.
Don’t be afraid to experiment with soaking times and drying methods to get the perfect look. Whether for crafts or gifts, your coffee-aged paper will bring a warm, nostalgic vibe to any project. So jump in and make your paper truly timeless!