How to Use Ninja Coffee Maker Like a Pro for Perfect Brewing Every Time
Owning a Ninja Coffee Maker opens the door to a more convenient and customizable coffee experience at home. These machines are designed to handle everything from single cups to full carafes, offering flexibility for every type of coffee drinker. Understanding how each feature works ensures that every brew delivers consistent taste and aroma.
Many people are drawn to Ninja Coffee Makers because of their versatility. With options for classic coffee, rich brew, iced coffee, and even specialty drinks, the machine caters to a wide range of preferences. Learning the best way to operate it helps you make the most of its capabilities without guesswork.
The process of mastering your coffee maker starts with familiarizing yourself with its controls, water reservoir, and brew baskets. This knowledge allows you to control strength, flavor, and portion size more effectively.
Knowing How to Use Ninja Coffee Maker not only improves your daily coffee routine but also helps protect the machine, extending its life while ensuring every cup tastes great.
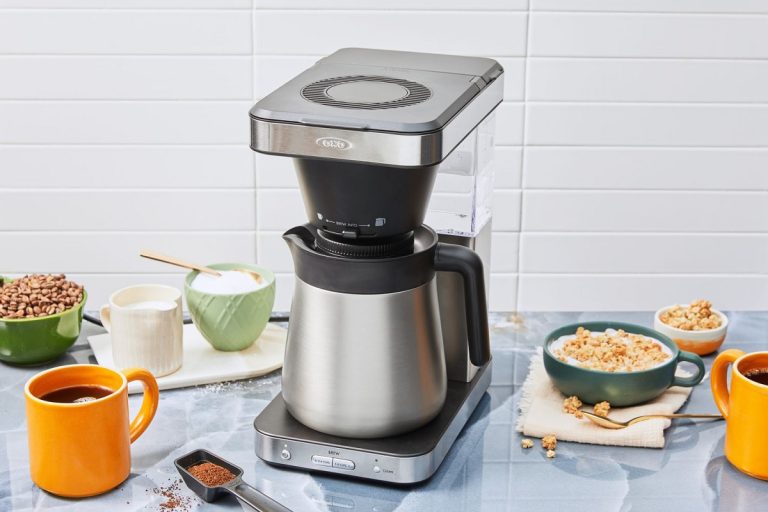
Setting Up Your Ninja Coffee Maker
Before brewing your first cup, setting up your Ninja Coffee Maker correctly is essential for optimal performance. Proper setup ensures consistent flavor, prevents leaks or malfunctions, and helps you get familiar with the machine’s features. Taking the time to carefully prepare the coffee maker lays the foundation for a smooth, enjoyable brewing experience every time.
Unboxing and Cleaning Your Coffee Maker
The first step in setting up a Ninja Coffee Maker is carefully unboxing all components. Most models come with a water reservoir, brew basket, carafe, and sometimes a removable frother or specialty cup attachments. Take note of each part and remove any packaging materials, protective films, or stickers.
Before using the machine for the first time, it’s important to clean all removable parts. Wash the carafe, brew basket, and any reusable filters with warm, soapy water. Rinse thoroughly to remove soap residue. Wiping the exterior with a damp cloth ensures the machine is ready for use. Running a full water-only brew cycle without coffee also helps flush out any dust or factory residues, preparing the Ninja Coffee Maker for your first proper brew.
Assembling the Machine Properly
Once everything is clean, reassemble the coffee maker carefully. Insert the brew basket into its designated slot and ensure it sits securely. Place the carafe on the warming plate, aligning it correctly to avoid spills during brewing. Fill the water reservoir with fresh, cold water, ensuring it doesn’t exceed the maximum fill line.
Pay attention to removable features like the frother or specialty attachments. Attach them according to the instruction manual to prevent leaks or improper operation. Many brewing issues stem from incorrect assembly, so double-check that all components are secure. Proper setup not only ensures smooth operation but also prolongs the lifespan of your machine, preventing unnecessary wear or malfunction.
Powering On and Understanding Controls
After assembly, plug in the machine and power it on. Ninja Coffee Makers typically feature a straightforward control panel with buttons for brew size, strength, and specialty options. Familiarize yourself with each button and its function. Some models offer programmable features for delayed brewing, adjustable temperature, or single-serve versus full carafe options.
Taking a moment to understand the display and indicator lights prevents mistakes during brewing. For instance, knowing which light signals an empty water reservoir or a basket misalignment avoids interruptions mid-cycle. This initial understanding is key for consistent performance, letting you confidently select your preferred brew settings without hesitation.
First Rinse Cycle and Readiness Check
Before brewing coffee, run a rinse cycle with just water. This step cleans internal pathways, removes any manufacturing residues, and ensures water flows correctly through the machine. Place the carafe in position, select the appropriate cycle, and let the machine run until completion.
After this first rinse, check for leaks, unusual noises, or misaligned parts. Everything should operate smoothly, and water should flow evenly through the brew basket. Completing this initial check confirms that your Ninja Coffee Maker is properly set up and ready for brewing. From here, you can start adding coffee grounds and experimenting with settings to create your perfect cup.
Choosing The Right Coffee and Grind
The coffee you use and how it’s ground play a crucial role in achieving the perfect cup with your Ninja Coffee Maker. Different beans, roast levels, and grind sizes interact with water and brewing time in unique ways. Understanding these variables helps ensure consistent flavor, aroma, and strength, letting you make the most of your machine’s capabilities.
Selecting Coffee Beans for Flavor and Roast
Choosing the right coffee beans starts with considering flavor profiles and roast levels. Light roasts tend to highlight origin characteristics such as floral, fruity, or citrus notes, while medium roasts offer balance with subtle sweetness and acidity. Dark roasts bring out bolder, deeper flavors with chocolate or caramel undertones.
Whole beans are preferable because they preserve flavor longer than pre-ground coffee. Freshly ground beans release aromatic oils that enhance taste and aroma during brewing. For Ninja Coffee Makers, medium roasts are often a safe choice for classic coffee options, while lighter or darker roasts can be used depending on personal preference and the brew type.
Paying attention to the roast date and quality of beans ensures a fresher, more flavorful cup. Specialty beans or single-origin options can provide unique tasting experiences, while blends offer consistency and balance. Choosing coffee based on both taste preference and brewing style ensures a satisfying cup every time.
Grinding Coffee to Match Brewing Method
Grind size significantly impacts extraction and flavor. For Ninja Coffee Makers, grind size should match the brewing method. Coarser grinds work well for full carafes or cold brew-style settings, while medium or slightly fine grinds are better for single-serve or rich brew options. Too fine a grind can result in over-extraction, making coffee bitter, while too coarse may under-extract, leaving the cup weak or flat.
Using a burr grinder is highly recommended over blade grinders, as it produces a uniform particle size. Consistent grinds allow water to pass evenly through the coffee, maximizing flavor extraction. Adjusting grind size can also help balance strength, acidity, and body, giving you more control over the final cup.
For multi-function brewing modes like iced coffee or specialty drinks, slightly coarser grinds reduce bitterness and ensure smooth flavor. Understanding how grind size interacts with brew time allows you to customize every cup, highlighting preferred flavor notes without compromising consistency.
Tips for Storing Coffee and Maintaining Freshness
Proper storage of coffee beans is essential for preserving flavor and aroma. Exposure to air, moisture, heat, and light can degrade beans, resulting in stale or muted coffee. Use airtight containers, preferably opaque, to minimize these effects. Store beans in a cool, dry place, away from ovens or sunlight, for maximum freshness.
Grinding beans just before brewing maintains aromatic oils and rich flavor. Pre-ground coffee can lose its potency quickly, especially in humid climates. Small batch grinding ensures each brew uses freshly ground coffee, making a noticeable difference in taste and aroma.
Labeling containers with roast date and type helps manage inventory and prevents accidentally using old beans. For those experimenting with different roast levels or origins, proper storage also allows you to compare flavors reliably, ensuring each cup delivers consistent satisfaction.
Matching Coffee Choice to Brew Strength
Different coffee beans and grind sizes interact with brew strength settings on your Ninja Coffee Maker. Classic or medium brew settings work well with balanced medium roasts, while rich brew or specialty options benefit from darker, bolder beans. Adjusting the coffee dose and grind size allows fine-tuning for desired intensity.
Experimentation helps find the ideal combination of beans, grind size, and brew strength. Tracking results in a notebook or app ensures repeatable success, letting you enjoy your preferred flavor consistently. With the right coffee and grind choices, every cup can reach its full potential in taste, aroma, and body.
Brewing Options and Settings
The Ninja Coffee Maker offers a wide range of brewing options and settings designed to suit different tastes, roast levels, and occasions. Understanding how each setting affects flavor, strength, and volume allows you to customize your coffee exactly the way you like it. Familiarity with these options helps you get consistent results and explore the full potential of your machine.
Classic Brew: Everyday Coffee Made Simple
The Classic Brew setting is ideal for a straightforward, balanced cup of coffee. It extracts a moderate amount of flavor from the coffee grounds, producing a smooth, well-rounded beverage. This setting is best for medium roasts or when you want a consistent, easy-drinking cup without intense boldness.
Using Classic Brew, the Ninja Coffee Maker controls water temperature and flow to achieve even extraction. The resulting coffee highlights sweetness and mild acidity without overwhelming bitterness. It works well for standard cups, family servings, or morning routines when you want a reliable flavor profile.
Adjusting the coffee-to-water ratio slightly can help fine-tune strength, especially for lighter or darker roasts. For those new to the machine, Classic Brew is a safe starting point before experimenting with specialty or rich brew options. Its simplicity ensures a satisfying cup every time.
Rich Brew and Specialty Modes for Bold Flavor
The Rich Brew setting increases extraction to deliver a more intense and flavorful cup. This mode is ideal for darker roasts, bold blends, or when you want a stronger, full-bodied coffee. It emphasizes aromatic oils and deeper notes, creating a robust drinking experience.
Specialty modes such as Iced Coffee or Over Ice adjust brew strength and temperature for optimal flavor in cold drinks. Iced Coffee brewing uses slightly stronger extraction so that the flavor remains vibrant even when diluted with ice. These modes highlight flexibility, letting the Ninja Coffee Maker adapt to both hot and cold preferences.
Experimenting with these settings allows you to discover how coffee flavor changes under different brewing intensities. Rich Brew is perfect for early mornings or when you need a bold cup, while specialty options cater to more creative or seasonal coffee experiences.
Adjusting Brew Size and Strength
Ninja Coffee Makers allow you to select different cup sizes, from single-serve to full carafe. Adjusting the size ensures that the machine dispenses the right volume without compromising flavor balance. Smaller brews concentrate extraction, enhancing taste, while larger brews maintain consistency for multiple servings.
Strength settings let you control how robust or mild the coffee tastes. Increasing strength generally means more coffee grounds per volume of water or slightly longer extraction, producing a richer, more aromatic cup. Reducing strength results in a lighter, smoother flavor. Both options provide flexibility to suit personal taste, time of day, or caffeine preference.
Understanding how size and strength interact with roast type and grind ensures a harmonious cup. For example, dark roasts paired with high strength create bold flavors, while lighter roasts are better suited for moderate strength to preserve delicate notes. These controls give you complete command over the final cup.
Programming and Delay Brew Features
Many Ninja Coffee Maker models include programmable and delay brew functions. These settings allow you to set a specific time for brewing so that coffee is ready when you wake up or return home. This convenience ensures freshly brewed coffee without the need to manually start the cycle.
Programming features also allow you to store preferred brew settings. By saving your ideal strength, cup size, and brew type, you can reproduce the same cup consistently every day. This feature is especially useful for households with multiple users who have different flavor preferences.
Delay Brew enhances daily routine flexibility. You can combine it with specialty modes or Rich Brew, waking up to a bold, aromatic cup or having iced coffee ready for a hot afternoon. Mastering these settings maximizes both convenience and quality in your coffee experience.
Step-By-Step Brewing Instructions
Brewing coffee with your Ninja Coffee Maker can be simple and precise when you follow the right steps. Understanding each stage—from preparation to pouring—ensures consistent flavor, optimal strength, and maximum aroma. Taking a methodical approach not only improves your coffee experience but also helps you maintain the machine and avoid common brewing errors.
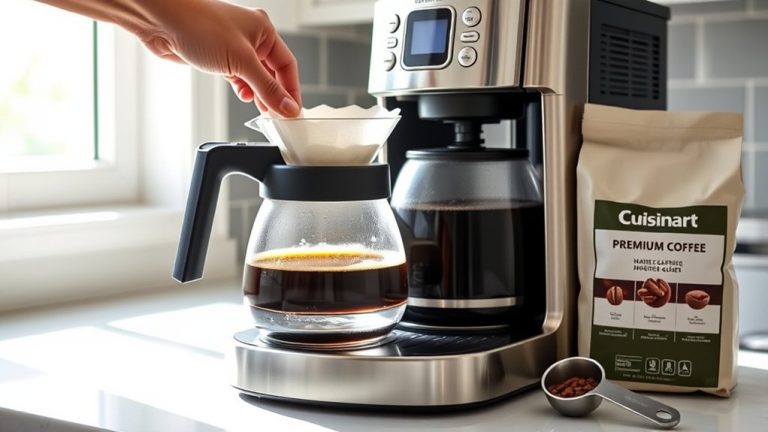
Preparing Your Coffee Maker and Ingredients
Start by ensuring your Ninja Coffee Maker is clean and assembled correctly. Wash the carafe, brew basket, and any removable components with warm, soapy water, then rinse thoroughly. Make sure the water reservoir is properly seated and free from debris. Using fresh, cold water is essential, as water quality significantly affects extraction.
Next, measure your coffee accurately. For standard strength, use about one to two tablespoons of coffee per six ounces of water, adjusting based on taste preference or brew type. Grind beans to the appropriate coarseness for the selected brew mode—medium grind works well for Classic Brew, while slightly finer grinds suit Rich Brew or specialty options. Avoid using pre-ground coffee stored for long periods, as freshness directly influences flavor and aroma.
Finally, ensure all attachments, such as frothers or reusable filters, are correctly positioned. Proper setup prevents leaks, uneven extraction, or weak coffee. Checking these details before starting ensures a smooth and reliable brewing process.
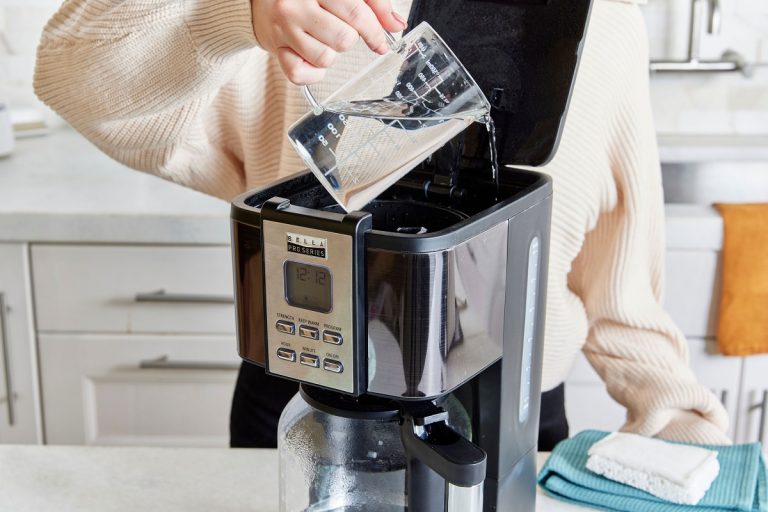
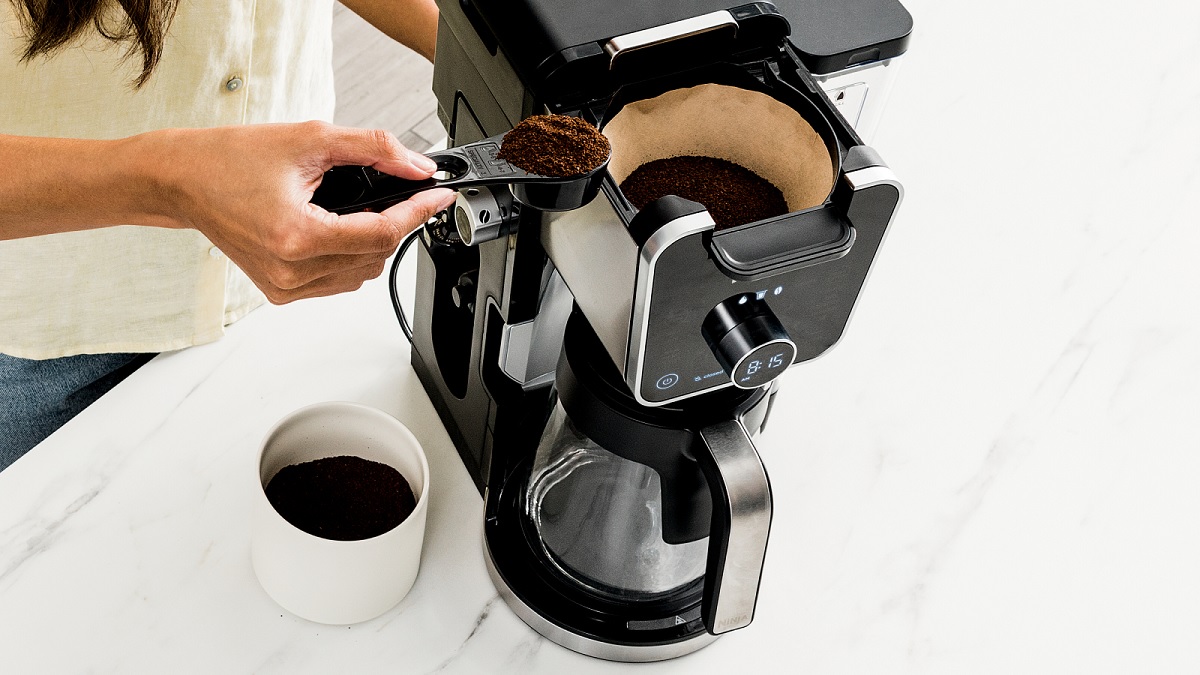
Filling the Water Reservoir and Loading Coffee
Once your ingredients are ready, fill the water reservoir with fresh water to match the desired brew size. Most Ninja Coffee Makers have clear markings indicating water levels for single cups, travel mugs, or full carafes. Avoid overfilling, as this can lead to overflow, while underfilling may result in weak or incomplete extraction.
Place the measured coffee grounds into the brew basket, ensuring they are evenly distributed. Tap the basket lightly to level the grounds, which promotes uniform water flow during brewing. For larger brews, check that the coffee grounds do not exceed the maximum basket capacity, as overcrowding can impede extraction and produce a bitter cup.
For those using reusable filters, rinse them briefly before adding coffee to remove any paper taste or residues. Single-use paper filters should be folded and positioned correctly to avoid collapse during brewing. Properly loading water and coffee is the foundation for balanced extraction and a satisfying cup.
Selecting Brew Settings and Modes
After loading water and coffee, select the desired brew setting on the control panel. Classic Brew provides a smooth, everyday cup, while Rich Brew intensifies flavor and body. Specialty modes, such as Iced Coffee or Over Ice, adjust brew strength and temperature to optimize flavor for cold beverages.
Next, choose the cup size or carafe option. Smaller servings concentrate extraction for a bolder flavor, while larger settings ensure consistent taste across multiple cups. Adjust the strength control if available to match personal preference, with stronger settings increasing coffee intensity and aromatic richness.
Understanding these settings is crucial for repeatable results. Combining the right brew mode, cup size, and strength ensures that your coffee highlights the desired roast notes, balances acidity and sweetness, and avoids bitterness or thinness. Take note of your preferred combinations for future consistency.
Starting the Brewing Cycle and Monitoring
Once all settings are selected, start the brewing cycle. The Ninja Coffee Maker will heat water and distribute it evenly through the coffee grounds. During this process, you may notice a pause as water saturates the grounds before dripping into the carafe—this pre-infusion stage helps extract full flavor.
Monitor the machine during the first few cycles to ensure everything operates correctly. Check that water flows smoothly, there are no leaks, and the carafe is positioned securely. Avoid opening the brew basket mid-cycle, as this interrupts extraction and may result in uneven flavor.
Pay attention to aroma and drip rate. Stronger scents typically indicate proper extraction, while slow or irregular dripping may signal uneven grind size or improper water distribution. This observation helps refine future brewing adjustments.
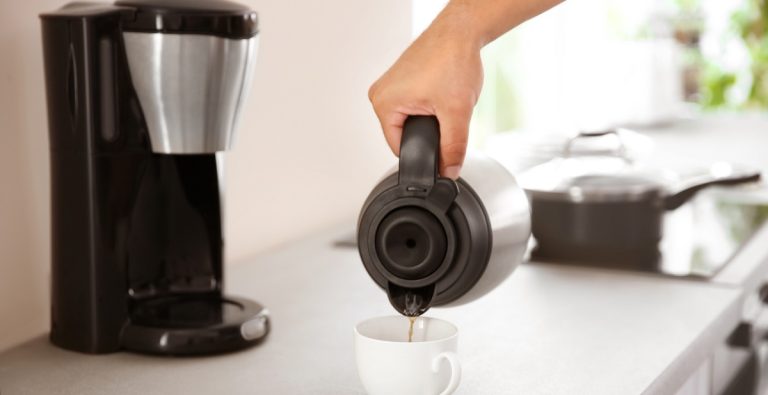
Pouring and Enjoying Your Coffee
When the cycle completes, carefully remove the carafe or cup. For larger brews, stir the coffee gently to ensure even flavor distribution. Serve immediately to enjoy optimal aroma and temperature. For iced or specialty drinks, pour over ice or add milk or flavorings as desired.
Clean the machine promptly after brewing. Empty the brew basket, rinse the carafe, and wipe down the exterior to maintain performance and hygiene. Regular maintenance prevents buildup, ensuring every cup tastes fresh and flavorful.
Cleaning and Maintenance Tips
Keeping your Ninja Coffee Maker clean and well-maintained is essential for ensuring consistently great-tasting coffee and prolonging the life of your machine. Regular cleaning prevents buildup of coffee oils, mineral deposits, and bacteria, all of which can impact flavor and performance. Following simple routines and periodic deep cleaning can keep your coffee maker functioning at its best.
Daily Cleaning Routine
Daily cleaning is the foundation of a well-maintained coffee maker. After each brew, remove the carafe and brew basket, discarding used coffee grounds. Rinse these components with warm water and mild dish soap, then allow them to air dry. Wiping down the exterior and control panel with a damp cloth removes spills and residue that can accumulate over time.
For reusable filters or frothing attachments, rinse thoroughly after each use. Paper filters should be discarded immediately to avoid mold or lingering odors. Cleaning daily prevents buildup that can affect both taste and machine performance. Even a quick rinse and wipe can make a noticeable difference in flavor and ensures the coffee maker remains hygienic and ready for the next use.
Weekly Deep Cleaning
Once a week, perform a more thorough cleaning to maintain optimal brewing quality. Remove all detachable components, including the water reservoir, brew basket, carafe, and any specialty attachments. Soak these parts in warm, soapy water for 10–15 minutes, scrubbing gently with a soft brush to remove stubborn coffee oils or residues.
Run a water-only cycle through the machine to flush out any lingering grounds or buildup in internal pathways. Check for any hard-to-reach areas and wipe them carefully. Weekly deep cleaning helps preserve flavor clarity and prevents residue from affecting aroma or causing bitterness. It also ensures smoother water flow, reducing the likelihood of clogs or uneven extraction during brewing.
Descaling and Mineral Maintenance
Over time, minerals in water can build up inside the coffee maker, forming scale deposits. Descaling your Ninja Coffee Maker every one to three months, depending on water hardness, helps maintain performance and prevents damage to heating elements. Use a commercial descaling solution or a mixture of equal parts water and white vinegar.
Fill the water reservoir with the solution and run a full brew cycle without coffee. Once complete, run two to three cycles with fresh water to rinse thoroughly, removing any residual vinegar taste or odor. Regular descaling ensures water heats efficiently, coffee extracts evenly, and the machine continues to produce flavorful, aromatic coffee consistently.
Long-Term Maintenance Tips
Beyond cleaning, proper handling and storage can extend the life of your Ninja Coffee Maker. Always empty the water reservoir after use to prevent stagnant water from affecting flavor. Avoid using abrasive cleaning tools that can scratch surfaces or damage components. Periodically inspect seals, gaskets, and removable parts for wear, replacing them as needed.
Label reusable components and store them in a clean, dry area to avoid contamination. Maintaining a consistent cleaning and maintenance schedule helps prevent mechanical issues, preserves coffee quality, and ensures your machine remains a reliable part of your daily routine. A little regular care goes a long way in keeping every cup tasting fresh.
Frequently Asked Questions
How Do You Set Up A Ninja Coffee Maker?
To set up your Ninja Coffee Maker, start by unboxing all parts and ensuring nothing is missing. Place the machine on a flat, stable surface near a power outlet.
Next, insert the brew basket, carafe, and any included filters. Fill the water reservoir with the recommended amount of water and add coffee grounds to the basket. Checking that all parts are properly aligned prevents leaks or errors. Once everything is in place, plug in the machine and turn it on, preparing it for your first brew.
What Coffee Grounds Should You Use For A Ninja Coffee Maker?
You can use either pre-ground coffee or freshly ground beans with your Ninja Coffee Maker. Medium grind works best for most brew types, while finer grinds are better for stronger or specialty brews.
Always measure the coffee according to the number of cups you plan to brew. Using the right ratio ensures balanced flavor and avoids weak or bitter coffee. Experimenting with beans and grind size allows you to find your preferred taste while maximizing the machine’s capabilities.
How Do You Select The Right Brew Setting?
Your Ninja Coffee Maker offers multiple brew settings like classic, rich, over ice, and specialty. To select the right one, consider the coffee strength you want and the type of drink you are preparing.
Use the control panel to choose your preferred cup size and brew strength. Specialty settings like “Over Ice” or “Rich” adjust water flow and brewing time to enhance flavor. Familiarizing yourself with each setting ensures consistent results and allows you to experiment with different tastes for every cup.
How Do You Clean And Maintain A Ninja Coffee Maker?
Cleaning your Ninja Coffee Maker is essential for great-tasting coffee. Start by rinsing the carafe, brew basket, and filter holder daily after each use. Wipe the exterior with a damp cloth.
Perform a deep clean every few weeks using a descaling solution or vinegar to remove mineral buildup. Regular maintenance prevents clogs, protects the machine, and prolongs its life. Make sure all removable parts are completely dry before reassembling to avoid mold or odors.
What Should You Do If Your Coffee Tastes Weak Or Bitter?
Weak or bitter coffee usually results from incorrect coffee-to-water ratios, wrong grind size, or improper brew settings. First, check that you’re using the recommended amount of coffee for your brew size.
Adjust the grind if necessary; too coarse can make coffee weak, and too fine can make it bitter. Also, try selecting a stronger brew setting or adjusting the cup size. Using filtered water can improve flavor by reducing mineral interference, giving your coffee a cleaner, richer taste.
Can You Make Specialty Drinks With A Ninja Coffee Maker?
Yes, you can make specialty drinks using your Ninja Coffee Maker. It allows you to brew concentrated coffee that works like espresso for lattes, cappuccinos, or iced coffee.
Some models include milk frothing capabilities or allow pairing with a separate frother. You can experiment with flavored syrups, hot chocolate, or over-ice coffee recipes. Following the correct brew strength and cup size ensures consistent results, letting you enjoy café-style drinks at home with ease.
Final Thoughts
Mastering your Ninja Coffee Maker opens the door to consistently great coffee at home, whether you prefer classic brews, rich flavors, or specialty drinks. Understanding the machine’s setup, brewing options, and controls ensures every cup meets your taste expectations while making the most of its versatile features. Following proper preparation and step-by-step instructions simplifies the process and enhances consistency.
Knowing How to Use Ninja Coffee Maker allows you to experiment with coffee types, grind sizes, and brew strengths confidently. By adjusting settings, exploring specialty modes, and following recommended water and coffee ratios, you can create a personalized brewing experience that highlights flavor, aroma, and body. Even small tweaks can make a noticeable difference in taste, giving you control over every aspect of your cup.
Regular cleaning and maintenance further enhance performance and longevity. With careful attention to these practices, your Ninja Coffee Maker becomes a reliable, efficient tool, producing delicious coffee day after day while protecting your investment and ensuring optimal brewing results.