How Do You Descale A Keurig Coffee Maker – Step By Step Guide
To descale your Keurig, start by emptying the water reservoir and removing the water filter. Mix a descaling solution, either Keurig’s or a 50/50 white vinegar-water mix, and fill the reservoir to the max line.
Run multiple brew cycles without a K-Cup, discarding the liquid each time. Then, pause for 30 minutes to let the solution work its magic.
After that, rinse thoroughly by running several water-only cycles until the water runs clear. Regular descaling every 3 to 6 months keeps your machine running efficiently.
It’s a simple step that really helps maintain your Keurig’s performance. Plus, knowing how to maintain and troubleshoot can keep your coffee game strong!
What’s the Keurig Descale Warning About?
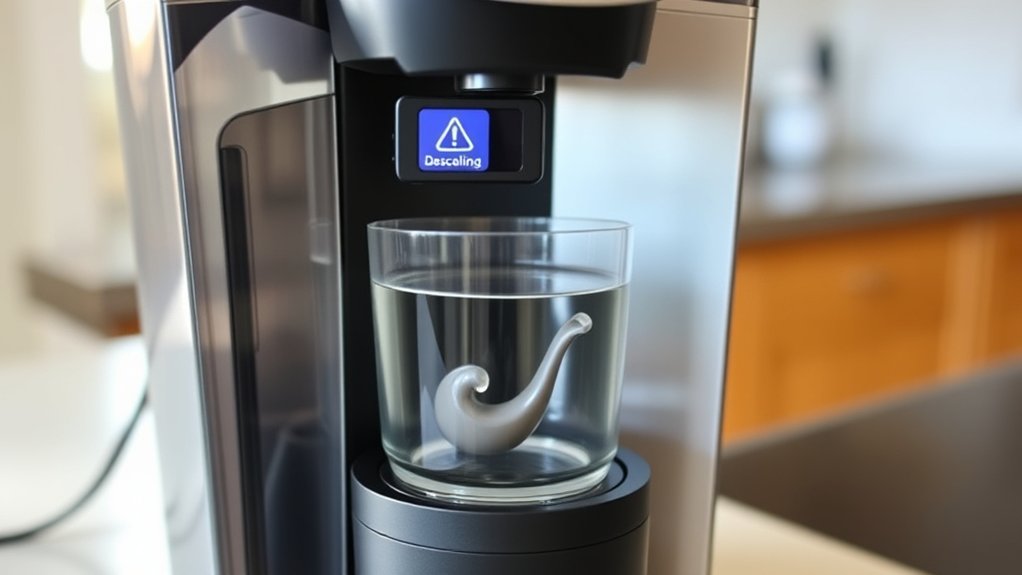
Although the Keurig descale warning may seem like a simple alert, it actually signals that mineral buildup from hard water has clogged your machine’s internal water lines. This buildup interferes with water flow and heating, which directly affects your coffee flavors. You might notice inconsistent brewing temperatures and extraction because of this.
The warning activates when sensors detect mineral deposits disrupting the ideal machine function. Ignoring it can lead to damage and diminished coffee quality. So, it’s definitely not something to overlook.
Regular descaling every 3-6 months helps keep your water quality controlled and prevents mineral accumulation. This also preserves the integrity of your Keurig’s components.
Even after you descale, the warning might stick around for a bit and require a reset.
What You Need Before Descaling Your Keurig
Before you start descaling, you’ll want to grab either a Keurig descaling solution or some white vinegar, plus fresh water. It’s a good idea to empty out the water reservoir and take out the water filter before you begin.
Also, have a large container handy to catch the liquid as it goes through the machine.
Oh, and don’t forget to unplug your Keurig if you need to.
Position it close to a drain or sink so you can easily get rid of the used solution when you’re done.
Descaling Solution Options
When preparing to descale your Keurig, you’ll need either Keurig’s proprietary descaling solution or a mixture of equal parts white vinegar and water.
This mix works as a natural and cost-effective alternative. Using the right descaling agent is super important for keeping your coffee tasting great and sticking to the recommended descaling schedule.
Make sure you have enough solution to fill the water reservoir completely before you start.
Keep these points in mind:
- Use Keurig’s descaling solution for guaranteed compatibility and effectiveness.
- Choose a 50/50 vinegar-water mix if you want an economical, natural approach.
- Have a large mug ready to catch the liquid during brew cycles to avoid spills.
Picking the right solution helps remove scale thoroughly.
That way, your machine runs smoothly and your coffee tastes just right every time.
Necessary Cleaning Materials
Choosing the right descaling solution sets the stage, but gathering the proper materials guarantees you can complete the process efficiently and without interruption. You’ll need either Keurig’s official descaling solution or a 1:1 white vinegar and water mixture.
Have a large mug ready to catch liquid during brew cycles, ensuring no spills disrupt your routine or affect coffee flavors.
Before starting, empty the water reservoir and remove or disable the water filter to prevent interference.
Access to a sink or drainage area is essential for safely disposing of used descaling liquids.
Finally, prepare clean, fresh water to thoroughly rinse your machine after descaling.
These materials guarantee ideal brewing speed and maintain the quality of your coffee flavors throughout the process.
Preparing The Machine
Although it might seem simple, properly preparing your Keurig is essential for effective descaling. This step guarantees your coffee brewing system functions at its best and extends the machine maintenance cycle.
Begin by emptying and removing the water reservoir to prevent residual water from diluting the descaling solution. Disable any water filter installed to allow the solution full access to internal components.
Gather necessary materials before starting: descaling solution or white vinegar, a large mug to catch dispensed liquid, and access to a sink or drainage area.
Turn on your Keurig and place the mug under the dispenser to prepare for brewing cycles.
Finally, consult the manufacturer’s instructions for any model-specific descaling requirements to guarantee a thorough and safe process.
Prepare Your Keurig for Descaling
First, go ahead and empty the water reservoir completely. Don’t forget to take out any water filters, too, since they can get in the way during descaling.
After that, gather all your descaling supplies, including a large container to catch the solution.
Oh, and make sure your machine is unplugged and the brew area is clear before you move on.
Empty Water Reservoir
How do you prepare your Keurig for descaling? Start by removing the water reservoir and emptying any remaining water. This step is vital to guarantee the descaling solution works effectively without dilution.
Next, inspect the water reservoir for mold buildup or mineral deposits. If you spot any, clean the reservoir thoroughly with warm, soapy water to maintain hygiene and performance. Rinse it well to remove all soap residue.
To summarize:
- Remove and empty the water reservoir completely
- Check for and clean any mold buildup or mineral deposits
- Rinse thoroughly and let the reservoir dry before refilling
Following these precise steps prepares your Keurig for efficient descaling and prolongs its lifespan.
Disable Water Filter
After emptying and cleaning the water reservoir, the next step is to disable your Keurig’s water filter. Removing the water filter prevents clogging or damage during descaling. Carefully take the filter out of the reservoir and place it somewhere safe.
If your model includes a filter bypass switch or setting, activate it to skip the filter during the descaling process. This guarantees the descaling solution flows unimpeded through the internal water lines, maximizing cleaning efficiency.
Ignoring this step can trigger a descaling warning or impair the process.
Gather Descaling Materials
Before you begin the descaling process, gather all necessary materials to guarantee a smooth and efficient procedure. Proper preparation guarantees your Keurig maintains ideal coffee temperature and brew strength after descaling.
Start by emptying the water reservoir and disabling any water filters to prevent interference.
Collect these essential items:
- Keurig descaling solution or white vinegar
- Large mug and access to a sink or drainage area
- Fresh, clean water for rinsing
Having these ready lets you execute the descaling steps without interruption.
Also, keep a microfiber cloth handy to wipe down the machine after descaling. This preparation helps maintain consistent coffee temperature and brew strength.
That way, your Keurig delivers quality coffee every time.
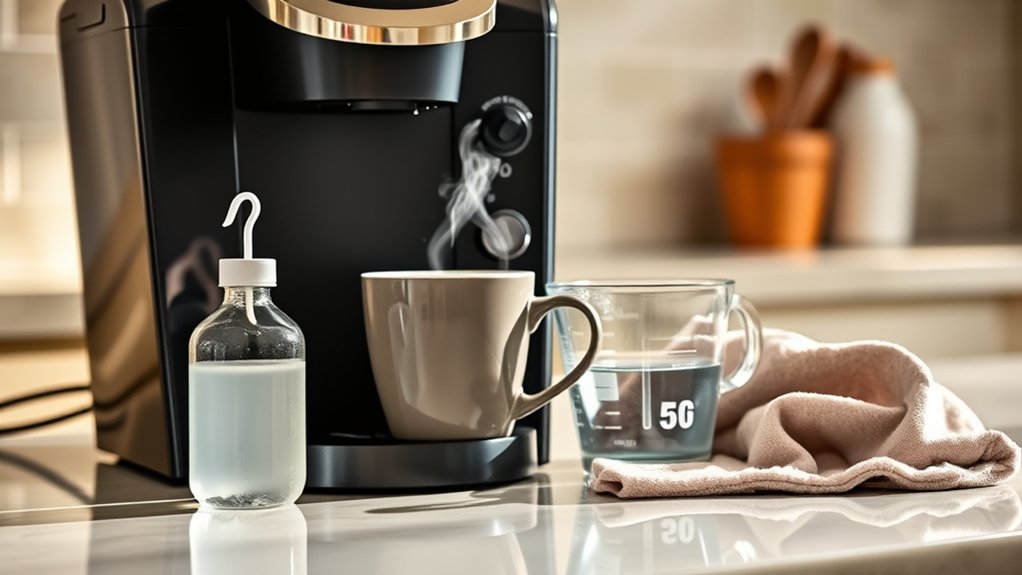
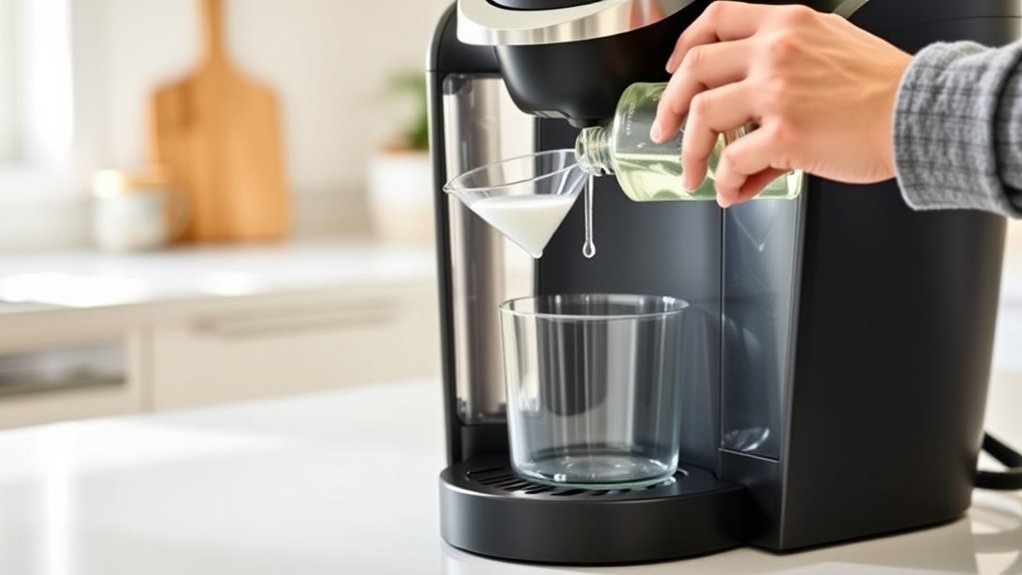
Mix the Descaling Solution Properly
When you mix the descaling solution, combine equal parts white vinegar and water or follow the manufacturer’s instructions for a commercial descaler. Use a measuring cup to guarantee an accurate 1:1 ratio. Mix the solution thoroughly by shaking or stirring gently until uniform.
Avoid overfilling the water reservoir. Fill only up to the maximum line to prevent spills. Although water temperature influences brewing, use room temperature water when mixing the descaling solution to maintain chemical stability.
Sticking to the recommended descaling frequency helps prevent buildup from impairing your Keurig’s performance. A properly mixed solution maximizes contact with internal components during the descale process.
This step is critical before running descale brew cycles to effectively dissolve mineral deposits without damaging your machine.
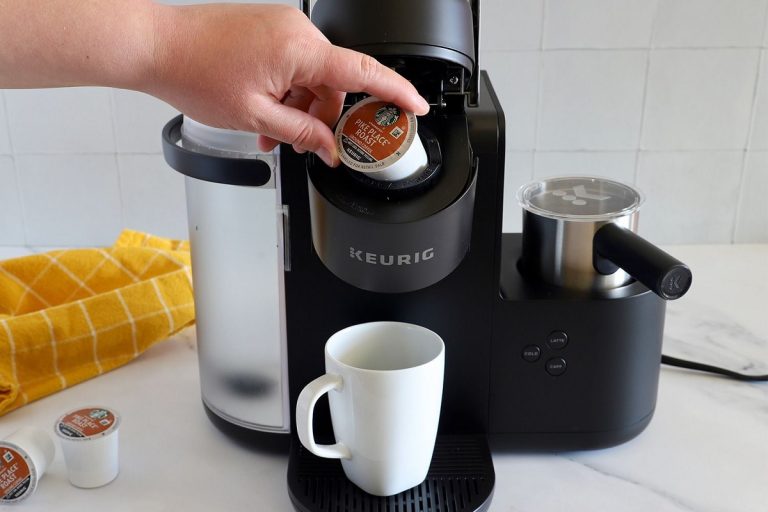
How to Run Descale Brew Cycles
Start by filling the water reservoir with the descaling solution or a vinegar-water mix at a 1:1 ratio.
Then, power on your Keurig and place a large mug under the brew head.
Select the largest brew size, but don’t insert a K-Cup.
Just run the brew cycles continuously until the reservoir is empty.
You’ll know the descale process is done when the “Add Water” indicator appears.
Preparing The Descale Solution
How do you prepare your Keurig for an effective descaling cycle? Proper preparation guarantees ideal descaling timing, preserving your coffee flavor by removing mineral buildup efficiently.
Start by filling the water reservoir with Keurig descaling solution or a 1:1 mixture of white vinegar and water.
This solution is essential for dissolving scale deposits that affect brew quality. To prepare correctly, follow these steps: use the largest brew size setting to maximize exposure of internal components to the solution.
Place a large mug on the drip tray to catch the liquid during the cycle.
Run multiple brew cycles without inserting a coffee pod until the reservoir is nearly empty.
This precise preparation guarantees thorough descaling, maintaining your Keurig’s performance and coffee flavor integrity. It’s pretty simple once you get the hang of it!
Running Brew Cycles
Although you’ve prepared the descaling solution, you’ll need to run multiple brew cycles using the largest brew size without inserting a K-Cup.
First, fill the water reservoir with the descaling solution and place a large mug on the drip tray. Select the largest brew size and start the cycle.
Allow the machine to complete the brew cycle, then discard the liquid. Repeat this process until the reservoir is empty.
Pause for 30 minutes to let the solution loosen mineral deposits affecting brewing temperature and coffee flavor.
Next, rinse the reservoir thoroughly with fresh water.
Finally, run several brew cycles with clean water to flush out any residue. This ensures your Keurig maintains ideal brewing temperature and preserves the integrity of your coffee flavor.
Why Let Your Keurig Sit During Descaling Helps
When you let your Keurig sit for 30 minutes during descaling, you give the solution time to penetrate and dissolve stubborn mineral deposits inside the water lines and internal components. This pause is essential because it enhances the descaling solution’s effectiveness. It guarantees thorough cleaning that supports ideal coffee brewing performance and maintains efficient water filtration.
By allowing the machine to rest, you prevent the rapid flow of water. This maximizes contact between descaling agents and limescale buildup.
Key benefits include:
- Improved breakdown of mineral deposits for smoother water flow
- Reduced risk of clogs or blockages in internal components
- Enhanced longevity and reliability of your Keurig’s coffee brewing system
This step ensures your Keurig operates efficiently and delivers consistent coffee quality. It’s a simple pause that really makes a difference!
How to Rinse Your Keurig After Descaling
Once you’ve completed the descaling process, you’ll need to thoroughly rinse your Keurig to remove any leftover descaling solution or vinegar. Start by filling the water reservoir with fresh, clean water to ensure the best water quality.
Place a large mug on the drip tray and run a brew cycle without inserting a K-Cup, collecting the rinse water in the mug. Go ahead and discard this water, then refill the reservoir with fresh water.
Repeat this rinse process at least 3 to 5 times until the water runs clear and there’s no chemical or vinegar smell. Proper rinsing is super important to avoid any lingering taste that could mess with your coffee flavor.
Keeping your water pathways clean helps your Keurig deliver fresh, consistent coffee every single time.
How to Fix the Descale Warning If It Won’t Turn Off
If the descale warning on your Keurig won’t turn off, it usually means the descaling process wasn’t completed properly or thoroughly. To fix this, you’ll want to focus on troubleshooting alerts and resetting indicators by repeating some key steps.
First, run the descaling cycle again to make sure all mineral buildup is dissolved.
Begin by running the descaling cycle again to fully dissolve any mineral buildup.
Next, flush the water reservoir completely to remove any leftover solution. Sometimes leftover liquid can cause those persistent warnings to stick around.
After that, check your model’s manual for a specific button combination that lets you manually reset the descale indicator.
To fix the descale warning effectively, try these steps:
Repeat the descaling cycle multiple times to clear any internal alerts.
Fully empty and rinse the water reservoir after descaling.
Then, use the correct button sequence to reset the descale indicator manually.
Following these steps helps your machine accurately show its maintenance status. This way, you won’t have to worry about false warnings anymore.
How Often Should You Descale Your Keurig?
Properly maintaining your Keurig means knowing how often to descale it to prevent mineral buildup and performance issues. Generally, you should descale your machine every 3 to 6 months, but this depends on your water hardness and usage frequency.
If you notice slower brewing times or mineral buildup warnings, increase the frequency.
In hard water areas, monthly descaling is advised to maintain ideal brewing temperature and guarantee consistent extraction across different coffee varieties. Regular descaling preserves heating element efficiency, stabilizing brewing temperature essential for flavor accuracy.
Following the manufacturer’s recommended intervals extends your Keurig’s lifespan and maintains coffee quality.
Adjust your descaling schedule based on how often you brew and the coffee variety you prefer, making certain your machine operates efficiently without compromising taste. It’s really about paying attention to your machine and giving it the care it needs to keep your coffee tasting great.
Clean the Keurig Brewing Needle and Pod Holder
Before descaling your Keurig, you’ll need to clean the brewing needle and pod holder to guarantee ideal water flow and prevent clogs. Poor water quality often causes mineral buildup, which can lead to brewing mistakes like weak coffee or machine errors.
Follow these steps to clean effectively. First, remove and disassemble the pod holder to access the brewing needle. Then, use a paper clip, toothbrush, or cotton swab to carefully clear mineral deposits and debris from the needle and pod holder.
Rinse all parts thoroughly with warm water to remove loosened residue. After reassembling, run a brew cycle without a pod to flush out any remaining debris. This helps make sure water flows properly and prevents brewing mistakes caused by clogged needles or compromised water quality.
Simple Maintenance Tips to Keep Your Keurig Running Smoothly
Although regular descaling is essential, maintaining your Keurig with simple weekly and monthly tasks will guarantee consistent performance and extend its lifespan.
Clean the water reservoir weekly with soap and water to prevent residue buildup that can affect water quality and coffee flavor.
Replace the water filter every two months to keep filtration top-notch.
Monthly, disassemble and clean the brew needle and pod holder to avoid clogs that disrupt brewing pressure and flavor extraction.
Wipe the exterior and control panel with a damp microfiber cloth to keep the machine hygienic and functional.
Finally, run a rinse cycle weekly using a Keurig rinse pod or plain water to flush internal components.
This helps preserve coffee flavor and ensures smooth operation.
Remove Mold and Keep Your Keurig Fresh
If you spot mold in your Keurig’s reservoir, don’t wait. Empty it immediately and clean the tank with warm, soapy water to stop the growth.
Prioritize reservoir hygiene by drying the tank thoroughly before refilling it with fresh water. This step is essential for effective mold prevention and maintaining your machine’s performance.
Thoroughly dry your Keurig reservoir before refilling to prevent mold and keep your machine running smoothly.
Avoid bleach or harsh chemicals to prevent damage to the reservoir. Regularly inspect and clean the reservoir and internal parts to inhibit mold buildup.
Using filtered or distilled water reduces mineral deposits, which helps discourage mold formation.
Follow these key actions to keep your Keurig fresh:
- Empty and clean the reservoir immediately upon mold detection
- Dry thoroughly before refilling
- Use filtered or distilled water for mold prevention and machine longevity
Frequently Asked Questions
Can I Use Lemon Juice Instead of Vinegar for Descaling?
Yes, you can use lemon juice as an alternative natural cleaning remedy, but it’s less potent than vinegar. You’ll need to dilute the lemon juice before using it.
Also, expect to run multiple rinse cycles to effectively descale your appliance and remove any citrus residue. It might take a bit more time, but it works!
Is It Safe to Descale My Keurig With Citric Acid?
Like a sharp scalpel, citric acid precisely removes mineral buildup. You can safely use it as a descaling solution. Just make sure to keep the concentration and cleaning frequency right.
Then, flush your machine thoroughly to protect your Keurig’s performance and keep the taste quality high. It’s a simple way to maintain your coffee maker without any hassle.
What Happens if I Skip Descaling My Keurig?
If you skip descaling, mineral buildup clogs your Keurig’s water lines. This reduces how often you can clean it and messes up your maintenance routine.
When that happens, you might notice the brewing temperature isn’t right, or you get warning errors. Over time, this can shorten your machine’s lifespan and lead to costly malfunctions.
Can I Descale My Keurig Without Removing the Water Filter?
Yes, you can descale your Keurig without removing the water filter, but it might reduce water quality and mean you’ll need to do maintenance more often.
For the best results, it’s a good idea to remove the filter. This helps make sure the descaling is thorough and prevents mineral buildup from happening.
How Long Does the Descaling Process Usually Take?
Think of descaling as giving your Keurig an invigorating spa day; it usually takes 30 to 60 minutes. Stick to the recommended descaling frequency to keep things running smoothly.
You can also try alternative cleaning methods for minor mineral buildup maintenance. These can help extend the time between full descales and keep your coffee tasting great.
Conclusion
By following these precise steps, you’ll breathe new life into your Keurig, banishing mineral buildup like a skilled technician tuning a finely crafted instrument. Regular descaling keeps your machine humming smoothly, ensuring every cup tastes as fresh as the first drop.
Treat your Keurig with this routine care, and it will reward you with consistent, flawless brews. It turns each morning ritual into a symphony of perfect coffee.