How to Clean a Coffee Maker with Baking Soda: Easy Steps for a Fresh Brew
Keeping your coffee maker clean is essential for both the flavor of your coffee and the longevity of your machine. Over time, coffee oils, mineral deposits, and residue can build up, affecting taste and performance. Using natural ingredients like baking soda provides a safe, effective, and inexpensive way to maintain your coffee maker.
Baking soda is a versatile cleaning agent known for its gentle abrasiveness and deodorizing properties. It removes stubborn stains, neutralizes odors, and helps dissolve mineral buildup without damaging delicate components of your machine. For you, this means a cleaner, fresher coffee experience every time you brew.
Cleaning with baking soda is simple and requires only a few household items, making it an accessible solution for routine maintenance. Following a structured process ensures your coffee maker stays in top condition, prolonging its lifespan.
By incorporating this method into your regular coffee care routine, you can enjoy consistently flavorful coffee while avoiding harsh chemicals. Understanding the step-by-step approach to cleaning ensures the best results for both you and your coffee maker.
Why Baking Soda Works for Cleaning Coffee Makers
Baking soda has become a popular choice for cleaning coffee makers due to its natural, non-toxic properties and effectiveness at removing residue. Unlike harsh chemicals, baking soda is safe for household use and gentle on appliance components. Understanding why baking soda works helps you appreciate its role in maintaining your coffee maker, improving both the flavor of your coffee and the machine’s performance over time.
Gentle Abrasive Properties
Baking soda is a mild abrasive, which allows it to scrub away stubborn coffee stains without scratching surfaces. Coffee makers often develop residue on carafes, filter baskets, and internal components that can affect taste and clog the machine. Using baking soda as a cleaning agent ensures that these areas are thoroughly cleaned without damaging delicate materials like glass, plastic, or metal.
When you sprinkle or dissolve baking soda, it helps break down surface stains and loosen buildup. This abrasive action is subtle but effective, making it ideal for regular maintenance. For you, this means cleaner surfaces and better tasting coffee without the risk of harming your machine. Regular cleaning with baking soda ensures that coffee oils and grounds do not accumulate, preserving the machine’s efficiency and longevity.
Deodorizing Effect
One of the most valuable features of baking soda is its natural deodorizing ability. Coffee makers can retain odors from old coffee grounds, mineral deposits, or stagnant water, which can affect the aroma and flavor of each cup. Baking soda neutralizes these odors, leaving the machine smelling fresh and clean.
When dissolved in water, baking soda interacts with acidic residues that contribute to lingering smells. For you, this means every brew starts with a neutral base, enhancing the flavor profile of your coffee. Regular use of baking soda prevents unpleasant odors from building up over time, ensuring a more enjoyable coffee experience and a cleaner, fresher machine overall.
Mineral Deposit Removal
Hard water can leave mineral deposits inside coffee makers, affecting performance and taste. Baking soda, when combined with warm water, helps loosen these deposits and makes them easier to rinse away. This is particularly useful for machines with internal tubes and reservoirs where mineral buildup is harder to reach.
The alkaline nature of baking soda reacts with acidic minerals, gently dissolving limescale and other deposits without the need for harsh chemicals. For you, this means improved water flow, better extraction, and longer-lasting components. Maintaining your coffee maker with baking soda ensures that it continues to operate efficiently and produces consistently flavorful coffee.
Safe and Environmentally Friendly
Baking soda is non-toxic and safe for both humans and the environment, making it an excellent choice for regular cleaning. Unlike chemical descalers or cleaners, it poses minimal risk to your hands, surfaces, or plumbing when rinsed properly.
For you, this means a cleaning method that is both effective and worry-free. You can maintain your coffee maker frequently without concern for chemical residues affecting your coffee or your household. Baking soda’s safety, affordability, and effectiveness make it a reliable solution for keeping your coffee maker in optimal condition.
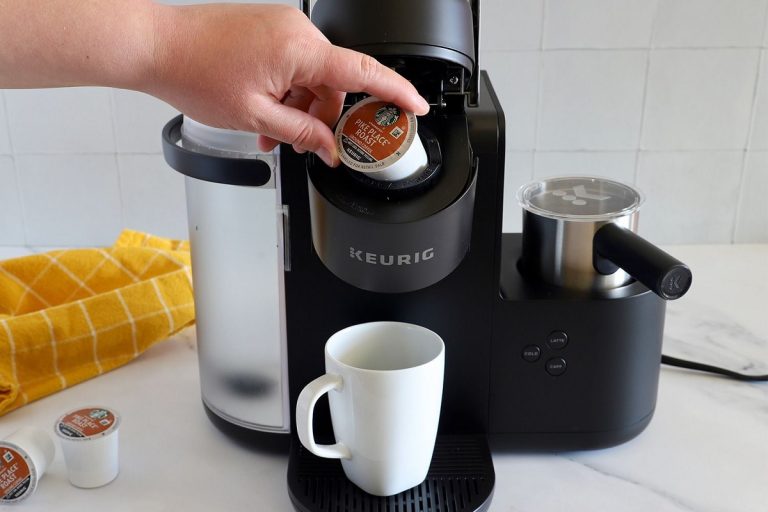
Preparing Your Coffee Maker for Cleaning
Before starting the actual cleaning process, proper preparation of your coffee maker is essential. Taking time to prepare the machine ensures safe handling, effective cleaning, and better results overall. From unplugging the appliance to organizing removable parts, preparation helps prevent damage and allows baking soda to work efficiently. These steps also ensure that residue, oils, and buildup are fully addressed during the cleaning process.
Unplugging and Cooling the Coffee Maker
The first step in preparing your coffee maker for cleaning is unplugging it and allowing it to cool completely. Cleaning a machine that is still warm or connected to power increases the risk of burns, electrical issues, or internal damage. For you, ensuring the machine is fully powered off creates a safe environment and allows you to handle each component with confidence.
Letting the coffee maker cool also prevents sudden temperature changes that could crack glass carafes or warp plastic parts. Many coffee makers retain heat in the warming plate or internal water system, so waiting at least 30 minutes after the last brew is recommended. This cooling period ensures that all components are safe to touch and ready for cleaning.
Taking this step seriously protects both you and the appliance. It also allows cleaning solutions like baking soda to work more effectively, since they won’t evaporate or react unevenly due to residual heat.
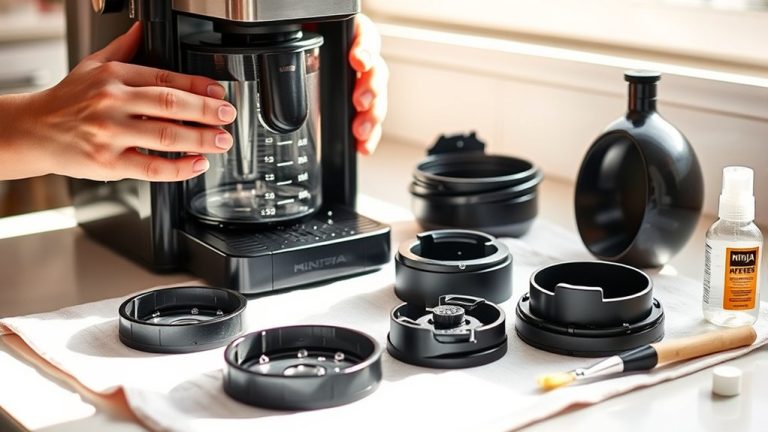
Removing and Inspecting All Removable Parts
Once the machine is unplugged and cool, remove all detachable components. This usually includes the carafe, filter basket, reusable filter, water reservoir lid, and any removable trays. Separating these parts allows for more thorough cleaning and helps you identify where buildup is most concentrated. For you, this step ensures no area is overlooked during the process.
Inspect each part carefully for stains, coffee oil residue, mineral deposits, or lingering odors. The carafe often holds visible stains, while filter baskets may contain trapped grounds or oils. Noticing these problem areas ahead of time helps you apply the right amount of baking soda and cleaning attention later.
Placing all components on a clean towel or countertop keeps them organized and prevents accidental damage. This preparation step also makes reassembly easier once cleaning is complete, saving time and reducing frustration.
Emptying Leftover Coffee and Water
Before cleaning, it’s important to discard any leftover coffee or water from the machine. Old coffee can leave behind acidic residue and strong odors that interfere with effective cleaning. For you, emptying the carafe and reservoir ensures the baking soda solution isn’t diluted or contaminated.
Check the water reservoir carefully, as standing water may contain mineral particles or bacteria buildup. Pour it out completely and gently shake the reservoir to remove trapped droplets. This creates a clean slate for the baking soda mixture to circulate properly through the machine.
Emptying leftover liquids also prevents spills during handling and cleaning. A dry, empty machine is easier to manage and allows cleaning agents to target buildup directly rather than mixing with old residue.
Gathering Cleaning Supplies in Advance
Preparing your supplies before starting makes the cleaning process smoother and more efficient. Gather baking soda, warm water, a soft sponge or cloth, and a measuring spoon. Having everything ready prevents interruptions and ensures consistent application throughout the cleaning process. For you, this preparation saves time and reduces the chance of mistakes.
Avoid using abrasive scrubbers or harsh chemicals, as they can damage surfaces and internal components. Baking soda works best with gentle tools that support its mild abrasive nature. Laying out supplies near the machine also keeps the workflow organized.
Step-By-Step Cleaning Process
Once your coffee maker is properly prepared, following a clear and structured cleaning process ensures the best results. Using baking soda correctly helps remove residue, odors, and buildup without damaging the machine. Each step plays an important role in restoring cleanliness and maintaining performance. By moving through the process carefully, you allow baking soda to work effectively throughout both removable parts and internal components.
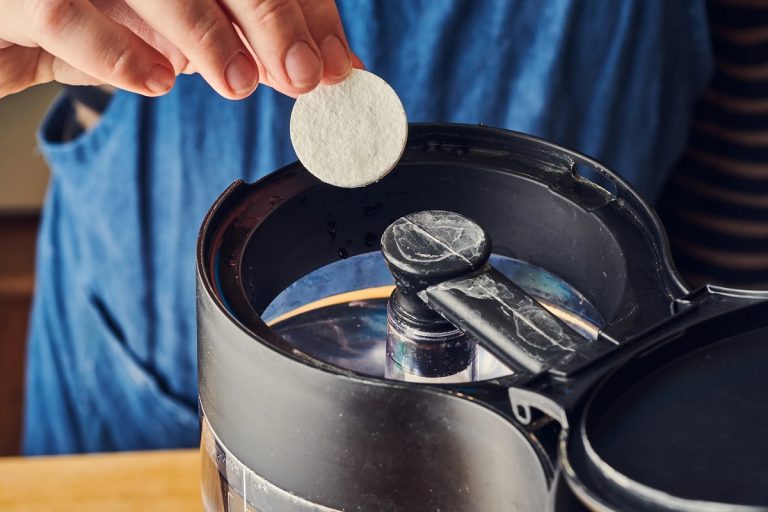
Cleaning Removable Parts With Baking Soda
Begin by focusing on the removable components such as the carafe, filter basket, reusable filter, and reservoir lid. Create a paste by mixing baking soda with a small amount of warm water until it reaches a thick, spreadable consistency. For you, this paste provides enough abrasion to lift stains while remaining gentle on surfaces.
Apply the paste to stained areas using a soft sponge or cloth. Pay extra attention to the carafe interior where coffee oils and discoloration often build up. Gently scrub in circular motions to loosen residue without scratching the glass. Rinse thoroughly with warm water to remove all traces of baking soda.
For the filter basket and reusable filter, soak them in a bowl of warm water mixed with baking soda for 15 to 20 minutes. This helps dissolve trapped oils and grounds. Rinse well and allow all parts to air-dry completely before reassembly.
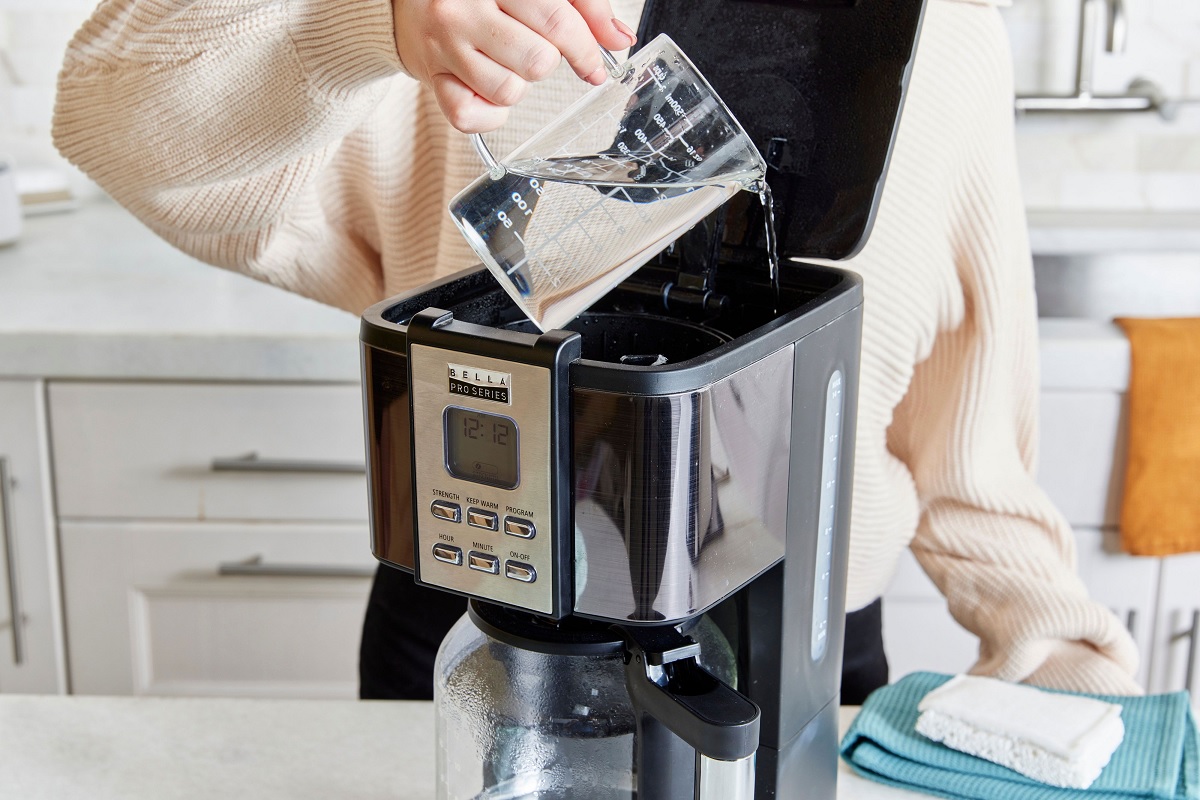
Running a Baking Soda Cleaning Cycle
After cleaning the removable parts, move on to the internal system of the coffee maker. Fill the water reservoir with warm water and add one to two teaspoons of baking soda, depending on the size of the machine. Stir gently to ensure the baking soda dissolves evenly. For you, this mixture acts as a mild cleaning solution that circulates through internal tubing.
Start a brewing cycle without adding coffee grounds. Allow the machine to run halfway through, then pause it if possible. Let the solution sit inside the machine for 20 to 30 minutes. This soaking period allows baking soda to break down mineral deposits and residue inside hard-to-reach areas.
After soaking, resume and complete the brew cycle. Discard the solution from the carafe and rinse it thoroughly. This step ensures internal pathways are cleaned and free from buildup that could affect flavor and water flow.
Flushing the System With Clean Water
Flushing is a critical step to remove any remaining baking soda residue. Refill the water reservoir with clean, fresh water and run a full brew cycle without coffee grounds. For you, this ensures no cleaning agent remains that could alter the taste of your next brew.
Depending on the size and condition of your machine, you may need to repeat this rinse cycle once or twice. Pay attention to any lingering odors or cloudy water in the carafe. Clear, odor-free water indicates the system is fully flushed.
This step also helps stabilize the internal temperature and prepares the machine for normal operation. Skipping or rushing the flushing process can leave residue behind, so taking your time here is essential for optimal results.
Wiping Down the Exterior and Final Assembly
While the machine completes its rinse cycles, take time to clean the exterior. Use a damp cloth with a small amount of baking soda or mild dish soap to wipe down the outside surfaces. Focus on buttons, handles, and the warming plate where spills often occur. For you, keeping the exterior clean improves hygiene and extends the machine’s lifespan.
Avoid letting water seep into electrical areas. Use a lightly damp cloth and dry immediately with a towel. Once all parts are clean and dry, reassemble the machine carefully, ensuring each component is securely in place.
Tips for Maintaining a Clean Coffee Maker
Keeping your coffee maker clean is not a one-time task but an ongoing habit that protects flavor quality and machine performance. Regular maintenance prevents buildup, extends the lifespan of the appliance, and ensures every cup tastes fresh. By following simple routines and paying attention to daily use, you can keep your coffee maker in excellent condition without extra effort or harsh cleaning methods.
Clean After Every Use
One of the most effective ways to maintain a clean coffee maker is to clean key components after every use. Empty the carafe, discard used grounds, and rinse the filter basket thoroughly with warm water. For you, this daily habit prevents coffee oils and residue from drying and hardening, which can be difficult to remove later.
Leaving used grounds or leftover coffee encourages bacteria growth and causes unpleasant odors over time. A quick rinse takes only a few minutes but significantly reduces buildup inside the machine. Washing removable parts regularly also prevents stains and ensures consistent coffee flavor.
Drying components before reassembling is just as important. Moisture trapped in the filter basket or carafe can lead to mildew or mineral spots. By incorporating simple post-brew cleaning into your routine, you create a strong foundation for long-term cleanliness and better-tasting coffee.
Schedule Regular Deep Cleaning
Even with daily rinsing, coffee makers require periodic deep cleaning to remove hidden buildup. Oils, mineral deposits, and residue can accumulate inside internal tubing and water reservoirs. For you, scheduling a deep clean every two to four weeks keeps the machine functioning efficiently and prevents flavor contamination.
Using natural cleaners like baking soda or vinegar during deep cleaning dissolves buildup without damaging internal components. Running a cleaning cycle followed by multiple rinse cycles ensures that residue is fully removed. This routine also improves water flow and brewing temperature consistency.
Consistency is key. Marking a cleaning reminder on your calendar helps prevent neglect. Regular deep cleaning maintains both performance and hygiene, ensuring your coffee maker continues to deliver fresh, balanced coffee with every brew.
Use Quality Water and Coffee
What you put into your coffee maker directly affects how clean it stays. Using filtered or purified water reduces mineral deposits that can clog internal parts. For you, this simple switch minimizes scale buildup and reduces how often deep cleaning is required.
High-quality coffee beans also play a role. Low-quality or overly oily beans can leave excessive residue in the filter basket and carafe. Choosing balanced, fresh coffee reduces oil accumulation and keeps components cleaner for longer.
Avoid letting water sit in the reservoir between uses. Emptying it after brewing prevents stagnant water and mineral concentration. By paying attention to ingredients and usage habits, you naturally support a cleaner machine and a better brewing experience.
Store and Handle the Machine Properly
Proper storage and handling contribute significantly to maintaining cleanliness. Keep your coffee maker in a dry, well-ventilated area away from heat and moisture. For you, this prevents mold growth and protects internal components from damage.
Wipe the exterior regularly to remove spills, dust, or fingerprints. Pay attention to buttons and the warming plate, as these areas often collect residue. Using a soft cloth keeps the surface clean without scratching.
Handling the machine gently during use and cleaning also prevents wear and tear. Proper storage and careful handling complete the maintenance routine, ensuring your coffee maker stays clean, reliable, and ready for daily brewing.
FAQs
How Often Should You Clean Your Coffee Maker With Baking Soda?
You should clean your coffee maker with baking soda about once every two to four weeks, depending on how frequently you use it. Daily use leads to faster buildup of coffee oils and mineral deposits that affect flavor and performance.
For you, regular cleaning prevents stale odors and bitter-tasting coffee. If you notice slower brewing, cloudy water, or lingering smells, it’s a sign cleaning is overdue. Consistent maintenance keeps your coffee maker running efficiently and ensures every cup tastes fresh and balanced.
Is Baking Soda Safe For All Types Of Coffee Makers?
Baking soda is generally safe for most drip coffee makers, glass carafes, and removable plastic components. Its mild abrasive nature cleans effectively without damaging surfaces or internal tubing.
For you, it’s important to avoid excessive amounts and always rinse thoroughly after cleaning. While baking soda works well for standard machines, always check your manufacturer’s guidelines. Proper use ensures safe cleaning without affecting seals, heating elements, or internal mechanisms.
How Much Baking Soda Should You Use When Cleaning?
Using the right amount of baking soda is essential for effective cleaning. Typically, one to two teaspoons mixed with warm water is enough for a full cleaning cycle.
For you, using too much can leave residue, while too little may not fully remove buildup. When cleaning removable parts, a small paste works best for stains. Balanced measurements ensure residue, odors, and mineral deposits are removed without leaving behind baking soda taste or buildup.
Can Baking Soda Remove Coffee Stains And Odors?
Baking soda is highly effective at removing both coffee stains and lingering odors. Its gentle abrasive action lifts stains from carafes and filter baskets without scratching.
For you, its deodorizing properties neutralize acidic odors caused by old coffee oils and stagnant water. When used regularly, baking soda prevents smells from returning and restores a clean, fresh environment inside your coffee maker, improving both aroma and taste.
Do You Need To Rinse After Cleaning With Baking Soda?
Yes, thorough rinsing is essential after cleaning with baking soda. Any leftover residue can affect the taste of your next brew and leave a slightly chalky flavor.
For you, running one or two full brew cycles with clean water ensures the machine is completely flushed. Clear, odor-free water in the carafe indicates proper rinsing. Skipping this step can undo the benefits of cleaning and impact coffee quality.
Can You Use Baking Soda Instead Of Vinegar For Cleaning?
Baking soda can be used as an alternative to vinegar, especially if you prefer a milder, odor-free cleaning method. It effectively removes oils, stains, and light mineral buildup.
For you, baking soda is ideal for routine maintenance, while vinegar may work better for heavy scale buildup. Many users alternate between the two. Baking soda’s gentle action and lack of strong smell make it a popular choice for regular coffee maker cleaning.
Conclusion
Keeping your coffee maker clean plays a big role in the taste and quality of every cup you brew. Using simple household ingredients makes the process easier and more affordable, while also helping you avoid harsh chemicals. A clean machine not only improves flavor but also supports better performance over time.
Regular maintenance helps prevent mineral buildup, lingering odors, and residue that can affect your coffee. By following a consistent cleaning routine, you ensure your machine stays fresh and functions efficiently. Paying attention to rinsing and wiping down removable parts makes a noticeable difference in daily brewing results.
Learning How to Clean a Coffee Maker with Baking Soda gives you a safe and effective way to maintain your appliance. With minimal effort and regular care, you can enjoy better-tasting coffee, extend the life of your machine, and keep every brew smooth and satisfying.