How to Brew Matcha Without a Traditional Whisk: Simple Tools, Smooth Results
Matcha has become a daily favorite for people who enjoy slow moments and clean energy. Its vibrant color and deep flavor feel special, yet many hesitate because they think the process requires traditional tools and perfect technique. In reality, making a satisfying cup can be far more relaxed.
Busy mornings, small kitchens, or travel days often mean working with what is already available. A mug, a jar, or even a simple spoon can still help create a smooth and comforting drink when used with care and patience.
This introduction explores how to brew matcha without a traditional whisk while keeping the experience approachable and enjoyable. The focus stays on texture, balance, and confidence rather than strict rules or expensive accessories.
Learning this method opens the door to consistency and ease. Matcha becomes part of real life, not a ceremony that feels out of reach. With the right mindset, every cup can feel intentional, calming, and genuinely satisfying.
Essential Tools You Can Use Instead of a Whisk
Making matcha at home does not require owning a traditional bamboo whisk. Many common kitchen tools can help you achieve a smooth, well-mixed cup with minimal effort. These alternatives focus on breaking up clumps, blending powder evenly, and creating a pleasant texture. With the right technique and a little patience, everyday items can deliver results that feel just as satisfying and intentional.
Jar With A Tight Lid
A small jar with a secure lid is one of the most effective and beginner-friendly tools for mixing matcha. This method works especially well for people who prefer simplicity and minimal cleanup. By adding matcha powder and warm water to the jar, sealing it tightly, and shaking vigorously, you create enough motion to break down clumps and blend the tea evenly.
The shaking action disperses the powder through the water, helping avoid the grainy texture that often comes from stirring alone. This tool is also forgiving, since you can adjust intensity easily by shaking longer or shorter. Many people enjoy this approach because it feels intuitive and does not require special skill.
Using a jar also supports flexibility in daily routines. It works well at home, at work, or even while traveling. A reused glass jar or small bottle can serve the purpose without extra cost. The result is a consistent blend that feels smooth and balanced.
This method creates minimal foam compared to a whisk, but the texture remains pleasant and drinkable. With practice, the jar method becomes a reliable option for anyone seeking convenience without sacrificing quality.
Handheld Milk Frother
A handheld milk frother is a popular alternative for those who enjoy a slightly frothy finish. This tool uses rapid spinning to blend matcha powder into water, creating a smooth consistency with light foam on top. It is especially helpful for people who enjoy café-style drinks at home.
The frother works best when the matcha is sifted beforehand, as this reduces clumping and allows the spinning motion to distribute the powder evenly. Placing the frother near the bottom of the cup and slowly moving upward helps incorporate air without splashing.
One advantage of this tool is speed. Within seconds, the matcha becomes fully mixed, making it ideal for busy mornings. The process feels controlled and efficient, which appeals to those who value consistency in their routine.
Cleaning is also simple, as most frothers rinse clean under water. While the foam differs from traditional whisking, the texture remains smooth and enjoyable. This tool suits people who want a modern, practical solution that blends ease with satisfying results.
Spoon Or Fork Method
A spoon or fork is often the most accessible option, especially for first-time matcha drinkers. While it requires more patience than other tools, it can still produce a pleasant cup when used carefully. The key lies in technique rather than force.
Start by adding a small amount of warm water to the matcha powder and stirring slowly to form a paste. This step helps break down clumps before adding more water. A fork works slightly better than a spoon due to its tines, which help press and separate the powder.
This method encourages mindfulness, as it takes more time and attention. Stirring in circular motions and pressing gently against the sides of the cup improves blending. Though foam is minimal, the flavor remains intact and smooth when done correctly.
Many people appreciate this approach because it requires no extra tools or preparation. It proves that matcha can fit into real-life routines without complication. With patience, the spoon or fork method becomes a dependable option for simple, everyday enjoyment.
Choosing the Right Matcha for Non-Whisk Brewing
Selecting the right matcha becomes even more important when you are not using a traditional bamboo whisk. Without whisking, the texture, grind quality, and freshness of the powder play a bigger role in how smooth and enjoyable the final cup feels. The goal is to find matcha that dissolves easily, tastes balanced, and fits naturally into simple brewing methods using everyday tools.
Grind Quality And Texture Matter Most
When brewing matcha without a whisk, the fineness of the powder directly affects how well it mixes. Matcha that is stone-ground to a very fine, silky texture blends more easily with water, even when shaken, stirred, or frothed. Coarser powders tend to clump, making the drink gritty and uneven when a whisk is not used.
A smooth grind helps the matcha suspend evenly in water instead of settling at the bottom. This creates a consistent mouthfeel from the first sip to the last. When shopping, look for matcha described as finely milled or stone-ground, as these terms usually indicate better texture.
The feel of the powder between your fingers can also offer clues. High-quality matcha feels soft and almost creamy, not sandy. This texture supports better mixing when using jars, spoons, or frothers.
Choosing finely ground matcha reduces frustration during preparation. It allows simple tools to work effectively, making non-whisk brewing feel effortless and reliable rather than messy or disappointing.
Flavor Profile That Works Without Froth
Flavor balance becomes more noticeable when matcha is not heavily frothed. Without a whisk, the tea may have less foam, which means bitterness or sweetness stands out more clearly. For this reason, selecting matcha with a naturally smooth and mellow flavor is essential.
Ceremonial-grade or high-quality daily matcha often offers gentle umami, mild sweetness, and low bitterness. These qualities shine even when the tea is stirred or shaken instead of whisked. Strong or overly bitter matcha can taste harsh without the softening effect of foam.
Look for flavor descriptions such as smooth, creamy, or naturally sweet. Avoid matcha labeled as very bold or intense when planning non-whisk brewing, as these tend to require precise technique to balance.
A well-balanced flavor profile makes the brewing process forgiving. Even small inconsistencies in mixing will not overpower the taste. This allows you to enjoy matcha comfortably using simple tools while maintaining a pleasant, calming drinking experience.
Freshness And Storage Play A Bigger Role
Freshness has a strong impact on how matcha behaves when brewed without a whisk. Fresh matcha dissolves more easily, tastes brighter, and produces a smoother texture. Older matcha often clumps more and tastes flat or bitter, which becomes obvious when using basic mixing methods.
Always check packaging dates and choose matcha that has been sealed properly. Airtight packaging protects the powder from moisture, light, and air, which helps preserve texture and flavor. Once opened, storing matcha in a cool, dark place keeps it usable longer.
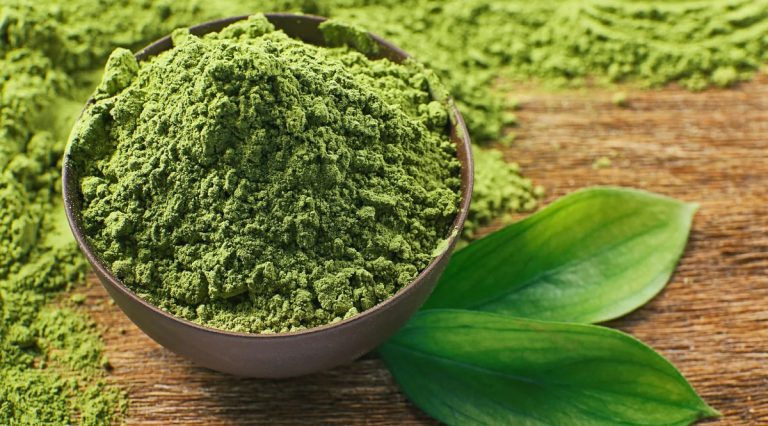
Fresh matcha has a vibrant green color, which usually signals better quality and flavor. Dull or yellowish tones often indicate oxidation or age. This visual cue can guide better choices for non-whisk brewing.
Good storage habits support consistent results. When freshness is maintained, even simple tools can produce a smooth and enjoyable cup. This makes non-whisk brewing feel dependable rather than unpredictable.
Matching Matcha Type To Your Brewing Style
Different matcha types suit different non-whisk methods. For jar shaking or frothing, lighter and smoother matcha blends work best because they mix quickly and evenly. For spoon or fork stirring, matcha with extra fine texture and mild flavor helps compensate for limited mixing motion.
Everyday matcha labeled for drinking rather than cooking is usually a safer choice. Culinary matcha often has stronger bitterness and coarser texture, which can be difficult to blend smoothly without a whisk.
Consider how often and where you plan to brew. Travel-friendly routines benefit from matcha that dissolves easily and tastes consistent without precise technique. Home routines may allow slightly more experimentation.
Choosing matcha that aligns with your brewing style reduces effort and improves results. It turns non-whisk brewing into a comfortable habit instead of a compromise, making each cup feel intentional and satisfying.
Water Temperature and Quantity Tips
Water temperature and quantity have a major influence on how matcha tastes and feels, especially when brewing without a traditional whisk. Since non-whisk methods rely on simple mixing rather than aeration, the balance of heat and water becomes essential for smooth texture and pleasant flavor. Small adjustments in these two areas can greatly improve consistency and overall enjoyment.
Ideal Water Temperature For Smooth Mixing
Using the right water temperature helps matcha dissolve more evenly when you are not whisking. Water that is too hot can scorch the delicate tea powder, bringing out bitterness and making clumps harder to break. Lukewarm to moderately warm water allows the matcha to blend gradually and stay smooth.
A temperature range that feels comfortable to the touch works well for non-whisk brewing. This level of heat encourages the powder to suspend evenly instead of settling at the bottom. When using jars or spoons, moderate heat gives you more control over texture.
Many people find success by starting with warm water and adjusting slightly based on taste. This approach keeps the flavor balanced and avoids harsh notes. Since non-whisk brewing lacks heavy foam, gentle heat helps preserve natural sweetness.
Consistent temperature improves repeatability. Once you find the heat level that works for your routine, each cup becomes easier to prepare with reliable results and minimal effort.
Balancing Water Quantity For Better Texture
Water quantity affects both thickness and flavor concentration. When brewing without a whisk, using too much water too quickly can thin the matcha and make blending uneven. Starting with a smaller amount of water helps create a smooth base before adding more.
A thicker initial mix allows clumps to dissolve more easily. After the powder is fully incorporated, gradually increasing the water quantity gives better control over final texture. This step-by-step method works well with spoons, forks, or jars.
The amount of water also shapes flavor intensity. Less water highlights umami and richness, while more water creates a lighter, refreshing cup. Without whisking, balance matters even more because flavor notes are more direct.
Finding the right quantity takes practice, but once discovered, it simplifies the process. Controlled water use helps matcha feel smooth and satisfying rather than diluted or uneven.
Adjusting Based On Brewing Tools
Different non-whisk tools respond differently to water temperature and quantity. Jar shaking works best with slightly more water, allowing space for movement and blending. The added volume supports even mixing without excessive effort.
Spoon or fork methods benefit from smaller water amounts at first. Limited motion means careful control is needed to prevent clumping. Gradual water addition improves consistency and prevents uneven texture.
Handheld frothers perform well with moderate water levels. Too little water restricts movement, while too much can reduce effectiveness. Adjusting quantity helps maintain balance and light foam.
Understanding how tools interact with water makes brewing more intuitive. Matching temperature and quantity to your chosen method creates smoother results and builds confidence in non-whisk matcha preparation.
Step-by-Step Brewing Methods Without a Traditional Whisk
Brewing matcha without a bamboo whisk becomes easy when you follow clear, repeatable steps. Each method relies on common tools and focuses on texture, balance, and consistency rather than ceremony. By understanding how different tools move water and powder together, you can create a smooth, enjoyable cup of matcha that fits naturally into everyday routines.
Jar Shaking Method
The jar shaking method is one of the most reliable ways to brew matcha without a traditional whisk. Begin by adding matcha powder to a small jar with a tight lid. Pour in a small amount of warm water first, just enough to cover the powder. This step helps soften the matcha and reduces clumping before full mixing begins.
Once sealed, shake the jar firmly using controlled, rhythmic movements. The shaking action forces the powder to circulate evenly through the water, breaking apart clumps through motion rather than pressure. After about twenty to thirty seconds, open the jar and check the texture.
Add more warm water gradually and shake again to adjust strength and consistency. This step-by-step increase prevents dilution while keeping the mixture smooth. The method feels forgiving, since additional shaking can always improve the blend.
The result is a well-mixed cup with light foam and even flavor. This approach works well for busy mornings, travel routines, and anyone who values simplicity without sacrificing quality.
Handheld Milk Frother Method
Using a handheld milk frother offers speed and control when brewing matcha without a whisk. Start by placing matcha powder into a wide cup or mug. Add a small amount of warm water and allow the powder to sit briefly to hydrate.
Insert the frother near the bottom of the cup and turn it on before lifting slowly upward. This motion blends the powder evenly while introducing gentle air. Moving too quickly can cause splashing, so slow, steady movement creates better results.
Once the matcha looks smooth, add more warm water to reach your preferred strength. Froth again briefly to unify the mixture. The spinning action helps maintain consistency even without traditional whisking.
This method produces a smooth texture with light foam, making it popular for latte-style drinks. It also supports consistency, since timing and motion are easy to repeat daily with minimal effort.
Spoon Or Fork Paste Method
The spoon or fork method relies on patience and careful technique. Begin by placing matcha powder into your cup and adding a very small amount of warm water. Use the spoon or fork to press and stir until a thick paste forms.
Focus on smoothing the paste by pressing it gently against the sides of the cup. This action breaks down clumps before more water is added. Rushing this step often leads to grainy texture later.
Once the paste looks smooth, slowly pour in additional warm water while stirring continuously. Circular motions help distribute the powder evenly. A fork works especially well due to its tines, which separate particles more effectively.
This method creates minimal foam but preserves flavor integrity. It encourages mindfulness and control, proving that matcha can be brewed well using only the most basic kitchen tools.
Blender Bottle Or Shaker Cup Method
A blender bottle or shaker cup offers a structured approach to non-whisk brewing. Add matcha powder to the bottle first, followed by warm water. The built-in mixing ball or grid helps break apart clumps during shaking.
Secure the lid tightly and shake using steady, full-arm movements. The internal mixer increases agitation, allowing the powder to disperse evenly with less effort than a plain jar.
After shaking, open the bottle and inspect the texture. Add more water if needed and shake again briefly. This step ensures balanced flavor and consistent thickness.
This method suits people who enjoy precise routines. The controlled design reduces mess and creates reliable results, making it ideal for daily matcha drinkers who want consistency without traditional tools.
Immersion Blender Low-Speed Method
An immersion blender can be used carefully for matcha brewing when set to low speed. Begin by placing matcha powder and a small amount of warm water into a tall container. Allow the powder to hydrate briefly.
Insert the blender fully into the liquid before turning it on. Keep the speed low to avoid excessive air and splashing. Short pulses help blend the powder without overheating the mixture.
Gradually add more warm water and pulse again until smooth. This method creates a very uniform texture, especially useful for larger servings or shared drinks.
While less traditional, this approach delivers consistent results. Controlled use ensures smooth blending while preserving flavor, offering another practical solution for brewing matcha without a traditional whisk.
How to Prevent Clumps Without a Whisk
Clumps are one of the most common challenges when preparing matcha without a traditional whisk. Since the powder is finely ground and naturally moisture-sensitive, it tends to stick together when mixed incorrectly. With the right approach, however, clump-free matcha is completely achievable using simple tools and thoughtful technique.
Start With Sifting Or Gentle Separation
One of the easiest ways to prevent clumps is to separate the matcha powder before adding water. Sifting the powder through a fine mesh strainer helps break apart compacted particles and introduces air. This simple step reduces resistance when the powder meets water.
If a strainer is not available, gently pressing the powder with the back of a spoon can help loosen it. Avoid forceful tapping, as this can cause uneven distribution. The goal is light separation rather than grinding.
Pre-separation allows the powder to hydrate evenly once water is added. This reduces the chance of stubborn clumps forming at the surface or settling at the bottom. Even basic tools perform better when the powder is prepared correctly.
This step supports smoother mixing later. It turns clump prevention into a proactive process rather than a problem to fix after blending has already begun.
Use A Small Amount Of Water First
Adding too much water at once is a common cause of clumping. When matcha is flooded quickly, the outer layer absorbs water while the inside remains dry, forming lumps. Starting with a small amount of warm water helps prevent this issue.
Create a thick paste by mixing the powder with just enough water to cover it. This allows the matcha to hydrate evenly and smoothly. Gentle stirring or pressing during this stage breaks down hidden clumps.
Once the paste is smooth, gradually add more water while continuing to mix. This layered approach keeps texture consistent and controlled. It works well with spoons, forks, and jars alike.
This method builds structure into the brewing process. By respecting the powder’s need to absorb water slowly, you create a smoother cup with less effort and frustration.
Control Motion And Mixing Speed
The way you move your tool matters as much as the tool itself. Fast or aggressive motion often traps air unevenly and pushes clumps to the sides of the cup. Controlled, steady movement encourages even blending.
Circular stirring motions help distribute the powder consistently. When shaking, use rhythmic movements rather than sharp jerks. Frothers should be moved slowly from bottom to top to avoid uneven mixing.
Speed control prevents clumps from hiding at the edges or bottom. Slower movements allow the powder to dissolve fully before being dispersed further.
Developing awareness of motion improves results over time. It turns mixing into a deliberate action that supports smooth texture without relying on traditional whisking techniques.
write a blog section for [Flavor and Texture Adjustments] with h2 and h3 format within 500+ words, write 50-70 words for h2 then start h3 and each h3 around 200 to 220 words minimum and in 4-5 paragraph without any final thoughts
Flavor and Texture Adjustments
Adjusting flavor and texture becomes especially important when preparing matcha without a traditional whisk. Since non-whisk methods create less foam and aeration, small changes in preparation have a noticeable effect on taste and mouthfeel. With mindful adjustments, you can shape each cup to feel smooth, balanced, and enjoyable using simple tools and thoughtful technique.
Balancing Strength Through Powder Quantity
The amount of matcha powder used directly affects both flavor intensity and texture. Using too much powder can result in a thick, bitter drink that feels heavy on the palate, especially without whisking. Using too little can make the matcha taste flat and watery.
Starting with a modest amount of powder allows you to build flavor gradually. When mixing without a whisk, consistency improves when powder is increased slowly rather than added all at once. This helps maintain smoothness while avoiding clumps.
Powder quantity also influences mouthfeel. Higher amounts create a richer, creamier texture, while lower amounts feel lighter and more refreshing. Finding balance depends on personal preference and brewing tools.
Adjusting powder thoughtfully makes each cup more predictable. Over time, this awareness allows you to fine-tune strength and texture to match your routine and taste.
Adjusting Water Ratio For Desired Texture
Water ratio plays a key role in shaping how matcha feels when sipped. Without heavy aeration, texture depends more on dilution control. Less water creates a thicker, more concentrated cup, while more water softens flavor and lightens texture.
When brewing without a whisk, adding water gradually improves control. Starting with a small amount helps create a smooth base, making it easier to adjust thickness later. Sudden dilution often leads to uneven texture.
Water ratio also affects how flavors unfold. Concentrated matcha highlights umami and depth, while diluted matcha feels gentler and easier to drink. Matching water volume to mood or time of day enhances enjoyment.
Learning how water ratio influences texture helps create consistency. It allows non-whisk methods to feel intentional rather than experimental or uncertain.
Enhancing Smoothness With Temperature Control
Temperature influences both flavor clarity and texture stability. Water that is too hot can emphasize bitterness and make matcha feel harsh. Cooler water helps preserve natural sweetness and smooth mouthfeel.
Moderate warmth allows the powder to dissolve evenly without stressing the tea. This is especially important when mixing without a whisk, as less aeration means fewer chances to correct texture issues.
Temperature adjustments can soften sharp flavors and improve drinkability. Slight cooling often creates a calmer, more rounded profile that suits non-whisk brewing.
Mastering temperature control refines texture naturally. It gives you another tool for shaping flavor without changing ingredients or equipment.
FAQs
Can You Brew Matcha Without A Traditional Whisk?
Yes, you can brew matcha without a traditional whisk and still enjoy a smooth, flavorful cup. You simply need to focus on technique rather than specialized tools. Everyday kitchen items can work well when used correctly.
When you hydrate the powder slowly and mix with intention, clumps are easier to avoid. Your attention to water temperature, motion, and ratio matters more than the whisk itself. With practice, brewing matcha this way feels natural and consistent.
What Are The Best Tools To Use Instead Of A Whisk?
You can use simple tools like a jar with a lid, a handheld milk frother, a spoon, or a fork. Each tool works differently but can still mix matcha effectively.
A jar allows shaking motion to break clumps, while a frother adds light foam quickly. A spoon or fork works with patience and proper technique. Choosing the right tool depends on your routine and how much control you want over texture.
How Do You Prevent Clumps Without A Whisk?
You prevent clumps by preparing the powder before adding full water. Start with a small amount of warm water to create a smooth paste.
Stir or press gently to break clumps before adding more water. This gradual approach allows the matcha to hydrate evenly. Controlled motion and steady mixing help maintain smoothness throughout the cup.
Does Water Temperature Matter For Non-Whisk Brewing?
Water temperature plays a major role when brewing matcha without a whisk. Water that is too hot can make the matcha bitter and harder to mix.
Using moderately warm water helps the powder dissolve evenly. This temperature preserves natural sweetness and improves texture. When you control heat carefully, your matcha tastes smoother and more balanced.
What Type Of Matcha Works Best Without A Whisk?
Finely ground, high-quality matcha works best when you are not using a whisk. Smooth texture and balanced flavor make mixing easier with basic tools.
Matcha meant for drinking rather than cooking dissolves better and tastes less bitter. Freshness also matters, as fresh matcha blends more evenly and delivers a brighter flavor in non-whisk methods.
Can You Make Frothy Matcha Without A Whisk?
You can create light foam without a traditional whisk by using a handheld frother or shaking matcha in a jar. These methods introduce air through motion.
While the foam differs from whisked matcha, it still feels pleasant. Gentle froth adds softness to the drink and improves mouthfeel. With the right tool, your matcha can feel café-style at home.
Is Brewing Matcha Without A Traditional Whisk Worth It?
Brewing matcha without a traditional whisk is worth it when you value flexibility and ease. You do not need perfect tools to enjoy quality matcha.
This approach fits real-life routines and makes matcha more accessible. With practice, you gain confidence and consistency. The experience feels relaxed, intentional, and satisfying without feeling limited.
Final Thoughts
Brewing matcha at home does not have to feel complicated or restricted by special tools. With simple kitchen items like a spoon, jar, or milk frother, you can still enjoy a smooth, flavorful cup that fits your routine and lifestyle. The key is paying attention to water temperature, mixing technique, and powder quality.
Learning how to brew matcha without a traditional whisk opens up flexibility for beginners and busy tea lovers alike. These alternative methods make it easier to enjoy matcha anywhere, whether at home, work, or while traveling, without sacrificing taste or texture.
By experimenting with different tools and small adjustments, you can find a method that works best for you. Consistency and practice matter more than perfection, and with time, your matcha experience will feel just as satisfying as any traditional preparation.