How To Descale A Keurig Coffee Maker – Step-By-Step Cleaning Guide
To descale your Keurig, first unplug it, remove K-Cups and filters, then empty the water reservoir. Fill the reservoir with either a commercial descaling solution or white vinegar. Run multiple brew cycles without a pod until the reservoir is empty to circulate the solution.
Next, rinse thoroughly by running 4-6 cycles with fresh water, discarding each brew. If the descale light stays on, try resetting it or clean the sensor areas.
For detailed steps and maintenance tips, keep exploring the process. It’s worth taking the time to keep your Keurig running smoothly!
Why You Should Descale Your Keurig Regularly
Although you mightn’t notice it immediately, mineral deposits like calcium and lime gradually build up inside your Keurig, which can impair how well it works. Using a descaling solution every 3-6 months is key to removing these deposits effectively.
Regular descaling stops blockages that slow down water flow and cause your coffee to brew inconsistently. This way, your coffee maker runs at its best.
Mineral buildup can also change the flavor of your coffee. So, routine descaling helps keep the taste just right by getting rid of residue.
If you skip this maintenance, you risk corrosion and damage to the internal parts, which can shorten your Keurig’s lifespan. By regularly descaling, you avoid costly repairs and keep your machine working smoothly.
Taking this simple care step ensures your Keurig stays reliable and delivers the best brewing experience over time, without problems caused by mineral buildup.
What You Need To Descale Your Keurig
Before you begin descaling your Keurig, gather the necessary supplies to guarantee an efficient process. Proper tools ensure thorough removal of mineral buildup and maintain your Keurig coffee maker’s performance.
Gathering the right supplies ensures effective descaling and keeps your Keurig running smoothly.
You’ll need a descaling solution like white vinegar or a commercial product to break down deposits effectively.
Furthermore, a large mug or container will catch the liquid during brewing cycles. Clean, filtered water is essential for rinsing after descaling.
For maintenance, a paper clip or small brush helps clear needle and pod holder clogs. Lastly, a soft cloth or microfiber towel keeps the exterior spotless.
- Descaling solution (white vinegar or commercial)
- Large mug or container
- Clean, filtered water
- Paper clip or small brush
- Soft cloth or microfiber towel
Identifying The Descale Light On Your Keurig
The descale light on your Keurig lets you know there’s mineral buildup that needs to be cleaned out to keep your machine running smoothly. Usually, this light pops up after about 3 to 6 months of using your Keurig, but it really depends on how hard your water is and how often you brew.
When you see that light, it’s a good idea to act right away. Doing so helps you avoid clogs and keeps your coffee tasting great every time.
Descale Light Meaning
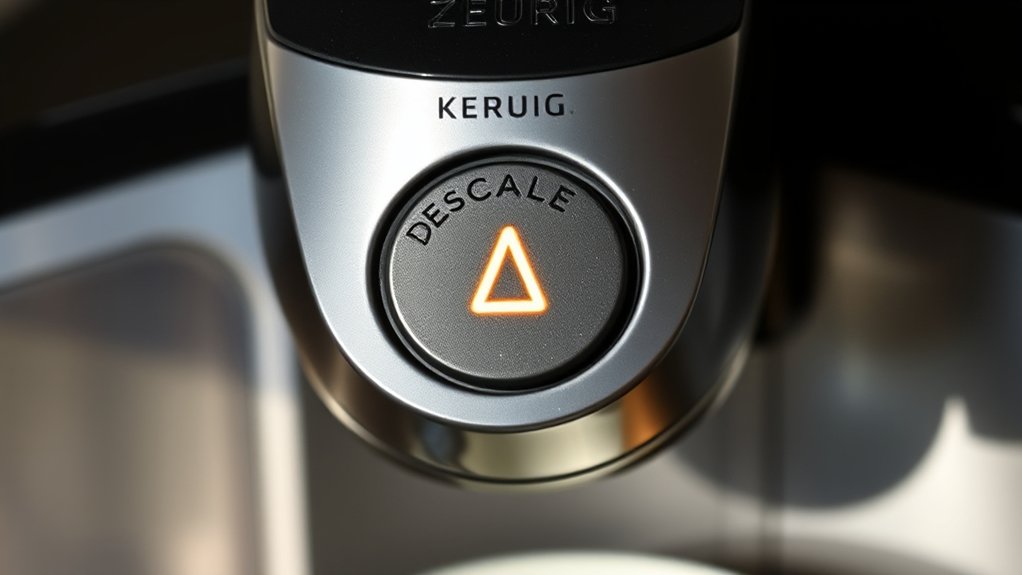
How can you tell when your Keurig needs descaling? The descale light is your machine’s alert to mineral buildup inside its internal components. This buildup can cause slow water flow or affect brewing quality, so the descale light acts as a proactive maintenance warning, even if your Keurig seems to work fine.
Key points about the descale light include:
- It typically flashes or stays steady depending on the model
- Indicates accumulated mineral deposits requiring cleaning
- Activates before noticeable brewing issues occur
- Differs in appearance across various Keurig models
- Resets only after you complete the full descaling process
Understanding the descale light helps you maintain ideal performance and extend your Keurig’s lifespan. Paying attention to it means fewer surprises and a better cup of coffee every time.
When Light Appears
Recognizing when the descale light appears on your Keurig helps you address mineral buildup promptly. The descale light typically comes on after a certain amount of use or when the machine detects reduced water flow caused by scale deposits. It’s basically a maintenance reminder, even if your Keurig seems to be working fine.
This light is telling you it’s time to descale your machine to prevent clogging and keep your coffee tasting great. When the indicator lights up, you should start a descaling cycle by following the manufacturer’s instructions to clean the internal parts effectively.
Once you finish descaling, don’t forget to reset the descale light. This step is important to make sure the alerts stay accurate going forward. Paying attention to this light helps you keep your Keurig running smoothly and extends its lifespan.
Getting Your Keurig Ready For Descaling
Before you start descaling, make sure to unplug your Keurig to keep things safe. Also, take out any K-cups and remove the water filter from the machine.
Next, go ahead and empty the water reservoir completely. While you’re at it, check the reservoir for any residue or buildup.
Doing these steps helps get your Keurig ready for a smooth and effective descaling process.
Unplug Machine Safely
Since safety is paramount, always unplug your Keurig from the power outlet before starting the descaling process. This step eliminates the risk of electrical shock and guarantees a safe working environment.
Before unplugging, make sure the machine has completely cooled down to avoid burns.
After unplugging, detach removable components like the water reservoir and pod holder to prevent damage during cleaning.
Inspect the power cord and plug for any signs of wear or damage before handling the machine.
Handle your unplugged Keurig carefully to protect internal parts from accidental harm.
- Always unplug before maintenance
- Let the machine cool down first
- Remove detachable parts after unplugging
- Check power cord and plug condition
- Handle the unplugged unit with care
Remove K-Cup And Filter
Although unplugging the machine guarantees safety, you’ll need to remove the K-Cup pod and water filter next to prepare your Keurig for descaling. Begin by opening the pod holder and carefully extracting the K-Cup pod to prevent any interference during the process.
If your model includes a water filter within the water reservoir, take it out and place it aside for cleaning or replacement. This step is essential to avoid clogging and guarantee effective descaling.
Furthermore, disassemble the pod holder if possible, and rinse it with hot water to eliminate leftover coffee residue. These preparations set the stage for thorough descaling by ensuring no components obstruct the cleaning solution, maintaining ideal machine performance and longevity.
Empty And Inspect Reservoir
How thoroughly have you checked your Keurig’s water reservoir lately? Before descaling, it’s essential to empty and inspect the reservoir to guarantee an effective cleaning process.
Begin by completely draining the reservoir to remove any residual water.
Then, remove the water filter if your model has one to prevent interference during descaling.
Carefully inspect the reservoir for mold, debris, or mineral buildup that could compromise your machine’s performance.
Rinse the reservoir thoroughly with warm water to eliminate dust or leftover cleaning agents.
Finally, dry the reservoir with a clean cloth or allow it to air dry before refilling it with the descaling solution.
- Empty the reservoir completely
- Remove the water filter
- Inspect for mold and buildup
- Rinse thoroughly with warm water
- Dry before refilling with solution
How To Descale Your Keurig Step-By-Step
Before you begin descaling your Keurig, make sure to remove any K-cups and water filters from the machine.
Start by removing all K-cups and water filters before you descale your Keurig.
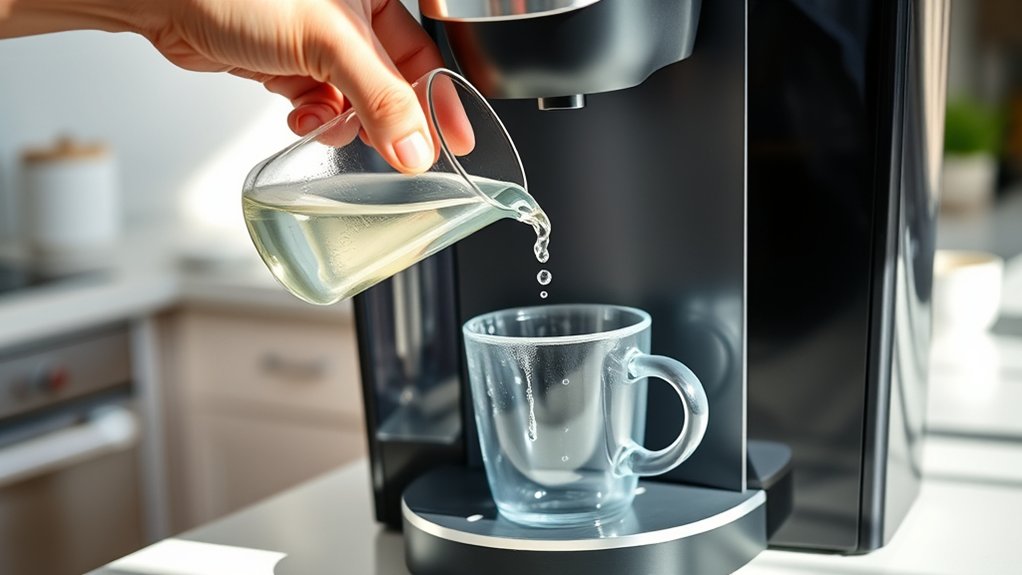
Next, fill the water reservoir with a descaling solution, either a commercial product or a mixture of white vinegar and water.
Start the descaling process by running multiple brew cycles without a K-cup. This allows the solution to pass through the internal components and dissolve mineral buildup.
Keep going until the reservoir empties completely. This step is really important for effective descaling and helps your machine perform at its best.
After that, you should run rinsing cycles to clear out any leftover descaling solution, but we’ll cover that part later.
Try to do this descaling routine every 3 to 6 months, or whenever the Descale indicator light comes on.
Doing so keeps your Keurig brewing efficiently and lasting longer.
How To Rinse Your Keurig After Descaling
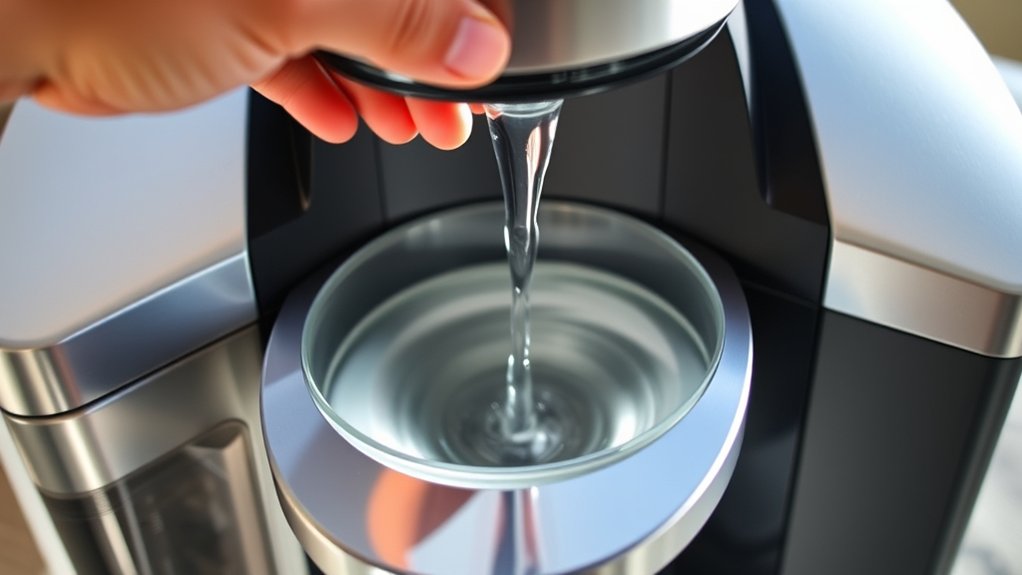
After you finish descaling, go ahead and fill up your Keurig’s reservoir with fresh water. Then, run several rinse cycles without a K-cup to flush out any leftover solution.
It’s a good idea to empty and refill the reservoir between each cycle to keep the rinsing effective.
Keep doing this until the water tastes neutral and there’s no smell coming from the machine. Once you’re done, wipe down the exterior and any removable parts to get rid of any residue.
Easy, right? Your Keurig will be all clean and ready to brew again!
Flushing Out Residue
Why is thorough rinsing essential once you’ve descaled your Keurig? Rinsing flushes out any leftover descaling solution or vinegar that could mess with your coffee’s taste and safety. To get rid of all that residue, you need to rinse carefully and consistently.
Here’s how to flush out residue properly:
- Run at least 12 cycles of fresh water through the machine.
- Use a large mug to catch rinse water each time.
- Empty and refill the water reservoir with clean water between cycles.
- Discard rinse water after each cycle so nothing gets contaminated.
Keep going until there’s no vinegar smell or taste left—usually after 3 or 4 full reservoirs.
Following this rinse routine makes sure your Keurig is free from chemical residue and ready to brew your next cup.
Multiple Rinse Cycles
How many rinse cycles does your Keurig need to eliminate descaling solution completely? You should run 4-6 brew cycles with fresh, filtered water to thoroughly flush out any residual solution. Between each cycle, let the machine sit briefly so the water can reach all internal components.
Remember to discard each brew separately to avoid mixing flavors or residues. Keep going until the water runs clear and there’s no vinegar or descaling smell left. This process helps make sure your Keurig tastes great and stays in good shape.
| Rinse Cycle Number | Water Type | Notes |
|---|---|---|
| 1 | Fresh, filtered | Initial flush, remove residues |
| 2 | Fresh, filtered | Begin clearing internal parts |
| 3 | Fresh, filtered | Continue rinse, check clarity |
| 4-6 | Fresh, filtered | Final cycles, ensure no odor |
Running these multiple rinse brew cycles ensures your Keurig is clean and ready for use.
Final Water Inspection
Once you complete the descaling process, thoroughly inspect and rinse your Keurig’s water reservoir to eliminate any lingering descaling solution. Use clean water to flush out all residues, making sure your machine is safe for brewing. Pay close attention to mineral deposits that might still cling to surfaces.
To properly finalize the rinse, empty and refill the water reservoir with fresh clean water. Run multiple brew cycles using only water to flush out descaling agents. Visually check the reservoir for discoloration or debris.
Taste a small amount of brewed water to confirm no vinegar or chemicals remain. Make certain steady, smooth water flow to verify complete removal of mineral deposits.
Performing this final water inspection guarantees your Keurig brews with pure, uncontaminated water after descaling. It’s a simple step but really important for great-tasting coffee every time.
Troubleshooting: Still Seeing The Descale Light?
If the Descale light remains on after completing the recommended descaling process, it may mean the cycle wasn’t fully completed or the sensor needs resetting.
First, make sure you’ve run enough rinse cycles to clear out any leftover minerals. Sometimes, if rinsing isn’t thorough, the light can stick around.
Check your Keurig model’s manual for the exact reset steps. Usually, pressing and holding certain buttons will clear the Descale light.
Mineral deposits or clogs might also cause the sensor to trigger falsely, so take some time to inspect and clean any buildup.
If the light still stays on after all this, take a look at the user manual or reach out to customer support for more help.
Addressing these things properly will ensure your Descale alerts are accurate and your machine runs smoothly.
How Often To Descale Your Keurig For Best Results
Because mineral buildup varies by water hardness and how often you use your Keurig, you should descale it every 3 to 6 months to keep it running smoothly. Adjusting how often you descale helps your machine work efficiently and consistently.
If you live in a hard water area, mineral deposits can build up faster, so you might need to descale more often.
Neglecting to descale can cause clogs, reduce water flow, and even make your coffee taste worse. Following the manufacturer’s recommended intervals also helps extend the life of your Keurig.
Here are some key points for the right descaling frequency:
- Descale every 3–6 months with normal use
- Increase how often you descale if you have hard water
- Prevent clogs and keep water flowing consistently
- Improve coffee taste by removing mineral buildup
- Follow the manufacturer’s guidelines to avoid damage
Sticking to this schedule will keep your Keurig performing at its best.
Cleaning Your Keurig’s Water Reservoir And Preventing Mold
Maintaining your Keurig’s water reservoir requires regular cleaning to prevent mold growth and guarantee ideal performance. Remove the reservoir frequently, wash it with warm, soapy water, and use a soft brush to scrub every corner and filter. Make sure it’s completely dry before reattaching to inhibit mold.
If you detect mold or a musty odor, discard the water immediately and clean thoroughly with vinegar during descaling. Avoid leaving standing water in the reservoir to reduce mold risk. Staying on top of this helps keep your coffee tasting fresh and your machine running smoothly.
| Concern | Solution |
|---|---|
| Mold buildup | Regular cleaning & drying |
| Musty odor | Vinegar rinse during descaling |
| Performance drop | Proper reservoir maintenance |
Adhering to these steps ensures your Keurig remains efficient and mold-free through consistent maintenance. It’s a simple routine that pays off in every cup!
Using And Cleaning Reusable Keurig K-Cups?
How often should you clean your reusable Keurig K-cups to guarantee consistent coffee quality? Regular cleaning after each use is essential to prevent coffee oil buildup and residue that degrade flavor and clog your machine.
Follow these steps for best maintenance:
- Check if your reusable K-cups are dishwasher safe, per manufacturer instructions.
- Hand wash with warm, soapy water using a soft brush or sponge to clean thoroughly.
- Avoid abrasive scrubbers that can damage the filter or plastic components.
- Rinse completely to remove soap and residual coffee grounds.
- Dry fully before reuse to prevent mold growth.
Keeping your reusable K-cups clean like this ensures you get fresh, flavorful brews every time. Plus, it helps extend the lifespan of your Keurig coffee maker. Easy, right?
Frequently Asked Questions
Can I Use Lemon Juice Instead of Vinegar to Descale My Keurig?
Yes, you can use lemon juice to descale your Keurig, but it’s less effective than vinegar at breaking down stubborn mineral deposits. Lemon juice’s natural acids help clean, but you’ll need longer or more frequent cycles.
Be sure to rinse thoroughly afterward to avoid any sticky residue or citrus taste in your coffee.
For quicker, deeper cleaning, vinegar remains the preferred choice.
Is It Safe to Descale My Keurig With a Commercial Descaler While Using a Water Filter?
Yes, you can descale your Keurig with a commercial descaler while using a water filter, but you should remove the filter first. Some descalers contain chemicals that might damage the filter, so check compatibility before use.
Removing the filter guarantees the descaler effectively cleans the machine without chemical exposure to the filter.
After descaling, rinse the reservoir thoroughly and run several water-only cycles to eliminate any residual descaling solution. This helps make sure your coffee tastes great and that no chemicals linger in your machine.
It’s a simple step that keeps your Keurig in top shape!
How Long Does the Descaling Process Usually Take From Start to Finish?
The descaling process usually takes about 30 to 45 minutes from start to finish. You’ll spend roughly 20 to 30 minutes running multiple brew cycles to flush out the descaling solution.
Then, you’ll allow the machine to soak for around 30 minutes.
After soaking, spend 10 to 15 minutes rinsing with fresh water. The exact time can vary depending on your Keurig model and how thoroughly you clean it.
It’s a bit of a wait, but it’s worth it to keep your machine running smoothly!
Can I Leave the Descaling Solution in the Reservoir Overnight for Better Results?
You wouldn’t leave your smartphone charging for days, so don’t leave descaling solution in your Keurig reservoir overnight. Doing so risks corrosion, residue buildup, and clogged filters.
Instead, follow the manufacturer’s recommended timeframe, usually a couple of hours. Then run a thorough rinse cycle.
This guarantees ideal cleaning without damaging internal parts.
It helps preserve your machine’s performance and flavor quality. Stick to the guidelines for safe, effective descaling results every time.
Will Descaling Remove Coffee Stains and Odors From My Keurig?
No, descaling won’t remove coffee stains or odors inside your Keurig. It primarily dissolves mineral buildup from water deposits.
To tackle stains and smells, you need to clean the removable parts with soap and water. Then, run a cleaning cycle using a baking soda solution or vinegar, followed by thorough rinsing.
Regularly wiping the exterior and scrubbing the pod holder with a toothbrush helps prevent lingering odors effectively. Just a little routine care goes a long way!
Conclusion
Descaling your Keurig is crucial to maintain peak performance and coffee quality. By following these precise steps, you’ll prevent mineral buildup that can impair function. Think of it like tuning a vintage pocket watch to keep perfect time.
Regular descaling not only extends your machine’s lifespan but also guarantees every cup tastes just right. Stay consistent, clean the reservoir, and don’t ignore the descale light. This way, you’ll keep your Keurig brewing flawlessly for years to come.