How to Reset a Keurig Coffee Maker: Step-by-Step Guide
Owning a Keurig coffee maker can make mornings much smoother, but like any appliance, it can occasionally run into minor issues. From error messages to brewing inconsistencies, small glitches may interrupt your daily coffee routine. Knowing how to address these problems quickly can save time and keep your favorite coffee flowing.
Understanding the proper steps to restore your machine helps prevent frustration and ensures consistent performance. Simple issues like frozen screens, unresponsive buttons, or water flow problems often have straightforward solutions that don’t require professional help.
For anyone experiencing a Keurig that isn’t operating normally, learning how to reset the device can be a game-changer. It’s a basic maintenance step that restores settings, clears temporary errors, and can improve brewing quality.
This guide walks you through the process, explaining the necessary steps and precautions. By mastering [How to Reset a Keurig Coffee Maker], you can maintain optimal performance and enjoy your coffee without interruption.
When You Should Reset Your Keurig Coffee Maker
A Keurig coffee maker is designed for convenience, delivering a hot cup of coffee at the touch of a button. However, like any electronic device, it can experience glitches or performance issues over time. Knowing when to reset your Keurig can save frustration, prevent potential damage, and ensure every brew is as enjoyable as it should be. Recognizing the signs that a reset is needed is an essential part of maintaining your machine.
Error Messages and Alerts
One of the most obvious indicators that your Keurig may need a reset is the appearance of error messages or warning alerts. These messages can range from “Descale” or “Add Water” notifications to more generic system warnings. While some alerts indicate routine maintenance, repeated or persistent messages may suggest the internal system requires a reset to restore normal function.
Resetting the Keurig in response to error alerts helps clear temporary system glitches that can interfere with proper operation. This step allows the machine to recalibrate and resume normal performance, ensuring brewing cycles run smoothly. Skipping a reset when errors persist can lead to continued frustration, such as incomplete brews or malfunctioning buttons. By addressing error messages promptly, you maintain the efficiency and reliability of your coffee maker.
Inconsistent Brewing
Another reason to consider a reset is inconsistent brewing results. For example, your Keurig may produce coffee that is weaker or stronger than usual, or the water may not flow evenly through the K-Cup. These inconsistencies often indicate that the machine’s internal settings or sensors have become misaligned, which can affect temperature, water volume, and overall flavor extraction.
Performing a reset allows the machine to recalibrate these internal mechanisms, restoring proper water flow and temperature settings. After resetting, you may notice a return to the consistent brewing strength and quality that your Keurig typically delivers. Regularly monitoring your coffee’s taste and flow can help you identify when a reset is necessary, preventing long-term issues and ensuring each cup meets your expectations.
Unresponsive Buttons or Screen
A common technical issue is when the buttons or touchscreen on your Keurig stop responding. This can occur due to temporary software glitches, power fluctuations, or internal memory errors. When the control panel is unresponsive, it becomes difficult to select brewing sizes, start cycles, or access maintenance features.
Resetting the Keurig in this situation often resolves the problem, effectively rebooting the system and clearing minor errors. After a successful reset, buttons and screens typically return to normal functionality, allowing you to operate the machine as usual. Understanding this reset option can save you from unnecessary repairs and helps you maintain control over the brewing process.
After Cleaning or Maintenance
Following major cleaning tasks, such as descaling or deep water reservoir cleaning, a reset is often recommended. These procedures can sometimes temporarily affect the machine’s internal settings or sensors, and a reset ensures that all systems are properly realigned. Performing a reset after maintenance helps verify that water flow, temperature, and pressure are functioning correctly.
Skipping a reset after cleaning can occasionally result in misread water levels or error messages, even when the reservoir is full. By resetting, you confirm that the Keurig recognizes all components correctly and is ready for normal operation. This step is particularly important for maintaining consistent performance and preventing future brewing issues.
Frequent Glitches or System Freezes
If your Keurig experiences frequent glitches, random stops mid-brew, or system freezes, a reset may be necessary to restore full functionality. Over time, internal software can accumulate temporary errors or minor corruption that affects performance. Regular resets can help clear these issues and reduce the likelihood of recurring problems.
Frequent glitches signal that the machine’s internal memory may need refreshing. By performing a reset, you allow the system to start fresh, clearing temporary files and resetting sensors. This simple step can significantly improve reliability and prolong the lifespan of your Keurig, ensuring that each cup is brewed efficiently without interruptions.
Preparing Your Keurig for a Reset
Resetting a Keurig coffee maker can solve many common issues, but proper preparation ensures the process goes smoothly. Taking a few steps before initiating a reset prevents complications, protects your machine, and ensures that it functions correctly afterward. Preparing your Keurig properly can also make the reset more effective, helping to restore optimal brewing performance and consistency.
Unplugging and Powering Down
The first step in preparing your Keurig for a reset is to safely power it down. Start by turning off the machine and unplugging it from the electrical outlet. Disconnecting the power helps prevent electrical surges or accidental operation during the reset process. This also ensures that any residual energy in the system is fully drained, which is important for a successful reboot.
Leaving the Keurig plugged in while attempting a reset can sometimes cause the internal memory to hold onto temporary errors, reducing the effectiveness of the reset. A complete power-off provides a clean slate for the machine to restore its default settings. For safety and to protect the internal electronics, always handle your Keurig with care while it is unplugged.
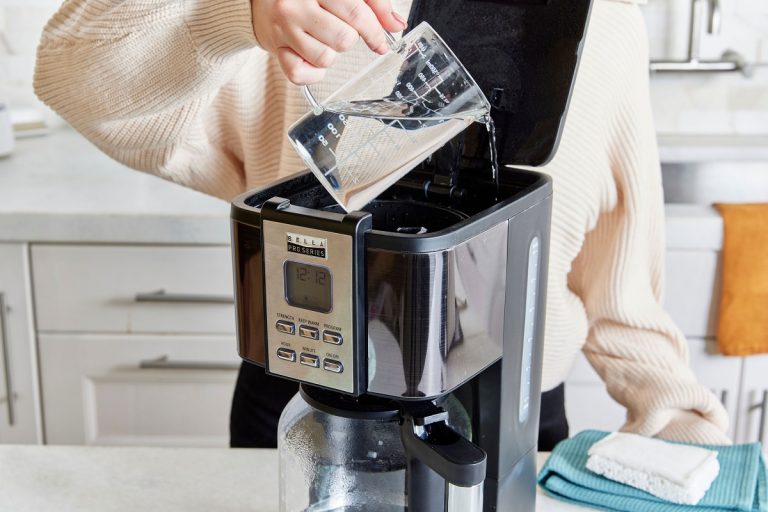
Emptying the Water Reservoir
Before performing a reset, it’s important to remove any water from the reservoir. Emptying the tank prevents leaks, reduces the risk of water damage during the reset, and ensures that the machine recognizes proper water levels afterward. A full or partially filled reservoir can sometimes confuse sensors during a reset, leading to inaccurate error messages or incomplete calibration.
After emptying, take the opportunity to inspect the reservoir for mineral buildup or debris. Cleaning it gently with warm water and a soft cloth can improve the machine’s performance and prepare it for a smooth reset. Ensuring the reservoir is clean and dry allows the Keurig to recalibrate water flow and temperature accurately once it is restarted.
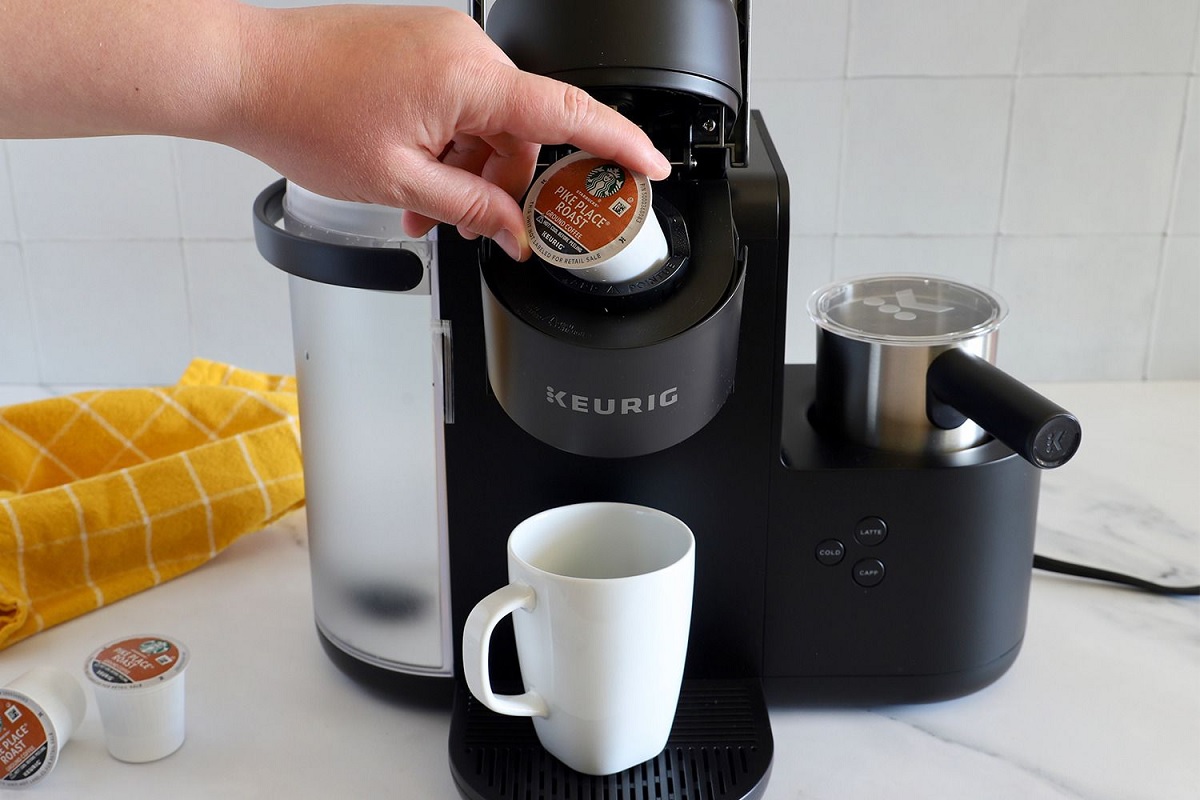
Removing K-Cups and Accessories
Another key step is to remove any K-Cups, pods, or reusable filters from the machine. Leaving these items in place during a reset can interfere with the sensors or brewing mechanisms, potentially causing additional error messages after the reset. Removing all accessories ensures that the machine is completely clear and ready to reboot its internal systems.
This is also a good time to check the K-Cup holder and needle assembly for clogs or coffee residue. Cleaning these components prevents blockages and helps the machine operate efficiently after the reset. Properly removing and cleaning accessories reduces the chance of complications and contributes to consistent coffee quality once the Keurig is back in use.
Wiping Down the Exterior and Interior
Before restarting the machine, it’s helpful to wipe down both the exterior and interior surfaces. Dust, coffee grounds, or water spots can interfere with the machine’s sensors or touchscreen responsiveness. Use a soft, damp cloth to gently clean the body, drip tray, and areas around the K-Cup holder.
Keeping the machine clean also allows you to inspect for any visible damage, such as cracks or loose parts, that could affect performance. This simple maintenance step ensures the Keurig is in optimal condition, making the reset process more effective and extending the machine’s lifespan. A clean, well-prepared Keurig is better equipped to resume normal operation immediately after the reset.
Checking for Error Indicators
Finally, review any error messages or blinking lights before performing the reset. Knowing the current issues can help determine whether the reset is likely to resolve them or if additional maintenance is required. Documenting error codes or unusual behaviors also helps if troubleshooting is needed later.
Understanding the machine’s current state ensures you take the right steps and prevents unnecessary frustration. By thoroughly preparing your Keurig, you maximize the chances that the reset will restore normal function, improve brewing consistency, and resolve common operational issues.
Step-by-Step Reset Methods
Resetting a Keurig coffee maker can resolve a variety of issues, from error messages to inconsistent brewing. Performing the reset correctly ensures that the machine recalibrates its internal systems, clears temporary glitches, and restores optimal performance. Following structured step-by-step methods makes the process simple and effective, whether you own a standard or touchscreen Keurig model.
Basic Power Reset
The most common reset method is the basic power reset, suitable for most Keurig models. Begin by unplugging the machine from the power outlet and leaving it disconnected for at least 30 seconds. This allows residual energy to drain from the internal circuits, clearing minor electronic glitches.
After waiting, plug the Keurig back in and power it on. Check that all lights, buttons, or the touchscreen display are functioning correctly. Running a water-only brew cycle without a K-Cup helps ensure the machine has properly recalibrated. This method resolves common issues like unresponsive buttons, stuck brewing cycles, or temporary sensor errors.
Performing a basic power reset regularly can prevent minor issues from escalating, ensuring your Keurig continues to operate reliably. This approach is straightforward, requires no additional tools, and is effective for most everyday problems.
Factory Reset (Touchscreen Models)
For Keurig models equipped with a touchscreen, performing a factory reset can address more persistent issues, such as software glitches or repeated error codes. Start by turning off the machine and holding down the touchscreen buttons indicated in the user manual, usually the 8-ounce and 12-ounce buttons simultaneously. Keep them pressed for approximately five seconds.
After releasing the buttons, the screen should flash or display a reset message. This method restores the machine to its original factory settings, clearing stored data and internal memory errors. Following the factory reset, run a water-only brew cycle to ensure the system is properly calibrated before inserting a K-Cup.
Factory resets are particularly helpful when your Keurig consistently shows errors that a basic power reset cannot resolve. While more advanced, this method effectively restores normal functionality and ensures touchscreen models operate smoothly.
Descale and Reset Combination
Sometimes, issues such as inconsistent water flow or weak coffee result from mineral buildup, and combining descaling with a reset can be particularly effective. Begin by running a full descaling cycle using Keurig-approved descaling solution or a mixture of vinegar and water, following the instructions carefully.
After the descaling process, perform either a basic power reset or a factory reset depending on your model. Running multiple water-only cycles afterward flushes any remaining residue and confirms that the machine has returned to optimal working condition. This combined approach ensures both mechanical and software systems are fully restored.
Descaling with a reset is essential for long-term maintenance, preventing buildup-related malfunctions while improving taste, temperature, and water flow consistency. It is an effective way to maintain your Keurig for years of reliable brewing.
Troubleshooting Persistent Issues
If problems persist even after performing standard resets, consider repeating the reset steps or combining methods. For example, unplugging the machine overnight before performing a factory reset can sometimes resolve lingering glitches. Checking internal components such as the water reservoir, K-Cup needle, and drip tray ensures there are no physical blockages interfering with performance.
Documenting any error codes or unusual behavior helps identify patterns and determine whether additional troubleshooting is needed. Persistent issues may occasionally require professional servicing, but performing structured resets first addresses the majority of common problems efficiently.
Following these step-by-step reset methods empowers Keurig owners to maintain their machines effectively. By understanding and applying these techniques, you can restore brewing performance, improve coffee quality, and extend the life of your Keurig.
Tips to Avoid Future Issues with Your Keurig
A Keurig coffee maker is a convenient appliance, but regular care and maintenance are key to preventing future problems. By adopting simple habits and following recommended practices, you can avoid frequent glitches, reduce the need for resets, and extend the lifespan of your machine. These tips focus on keeping your Keurig clean, well-maintained, and running efficiently for years.
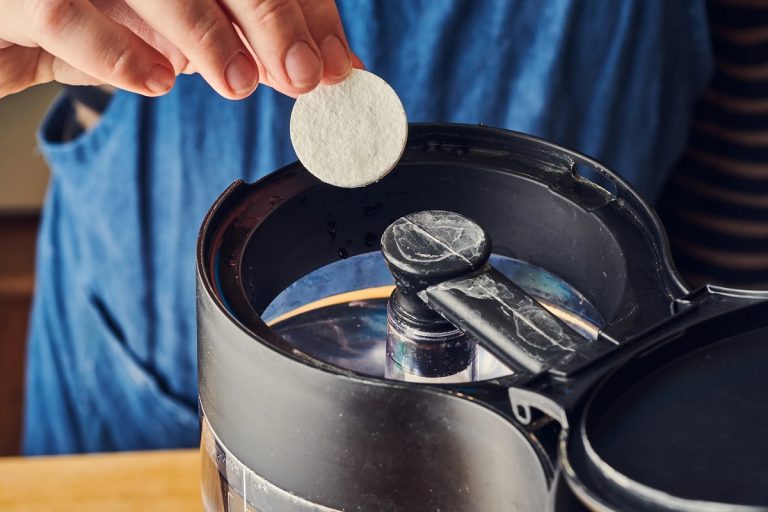
Regular Cleaning and Descaling
One of the most important steps in preventing issues is routine cleaning and descaling. Mineral buildup from water can affect the heating element, water flow, and overall taste of your coffee. Running a descaling solution through your Keurig every three to six months, depending on usage, helps remove limescale and maintain optimal performance.
In addition to descaling, clean removable parts like the water reservoir, drip tray, and K-Cup holder regularly with warm soapy water. Using a soft cloth or sponge prevents scratches, while cleaning the needles carefully ensures proper water flow through each pod. Establishing a consistent cleaning routine minimizes errors such as weak brews, slow water flow, or sensor malfunctions.
Regular maintenance also improves the longevity of your machine, reducing the frequency of resets and keeping each cup of coffee tasting fresh and consistent. These small, preventive steps go a long way in protecting your investment.
Use Filtered Water
The type of water you use in your Keurig can significantly impact performance. Tap water with high mineral content can contribute to faster buildup in the internal components, leading to blockages and heating issues. Using filtered or distilled water reduces scale accumulation and helps maintain the machine’s efficiency.
Filtered water not only protects the internal mechanisms but also enhances the flavor of your coffee. Hard water can leave subtle mineral tastes that affect the overall brewing experience. Replacing the water regularly and avoiding stagnant or leftover water in the reservoir prevents bacterial growth and ensures each brew is fresh.
Consistently using filtered water reduces the need for frequent descaling, prevents sensor malfunctions, and contributes to more reliable, flavorful coffee over time. It’s a simple step that protects both the machine and your daily cup.
Avoid Overuse and Overloading
Overusing your Keurig or running back-to-back brews without allowing the machine to rest can cause wear on internal components. Giving the machine a short break between uses ensures the heating element can regulate temperature and reduces stress on sensors and pumps.
Additionally, avoid overfilling the water reservoir beyond the maximum line or inserting multiple pods at once. Overloading can lead to leaks, clogs, or error messages, which may require a reset to fix. Using the machine within recommended limits helps maintain consistent water flow, accurate brewing temperatures, and proper sensor functionality.
Moderation and proper use help prevent long-term damage, ensuring your Keurig continues to perform reliably without frequent resets or repairs. Treating the machine gently promotes both durability and optimal brewing quality.
Store Properly and Maintain Accessories
Proper storage and maintenance of your Keurig and its accessories also prevent future issues. If the machine will not be used for an extended period, empty the water reservoir and clean all removable parts thoroughly. Storing the Keurig in a dry, cool area prevents corrosion or mold growth inside the system.
Regularly checking the K-Cup holder, needles, and drip tray for debris keeps the machine operating smoothly. Replacing worn-out or damaged parts promptly ensures consistent performance and reduces the likelihood of repeated errors. Routine attention to accessories and the main unit maintains both hygiene and functionality.
FAQs
How Do I Perform a Basic Reset on My Keurig Coffee Maker?
To perform a basic reset, first turn off your Keurig and unplug it from the power source. Wait at least 30 seconds to allow internal components to fully power down. Next, plug it back in and turn it on, allowing the machine to reboot.
You should notice the display returning to its normal state and all buttons becoming responsive. This basic reset often resolves common issues such as unresponsive buttons, error messages, or minor brewing problems, making it the first step before considering a full or factory reset.
How Do I Factory Reset a Smart Keurig Model?
For smart or connected Keurig models, a factory reset restores the coffee maker to its original settings. To do this, navigate through the machine’s menu or app interface to the “Factory Reset” option. Confirm your choice when prompted.
After resetting, your profiles, custom brew settings, and Wi-Fi connections will be erased. You will need to set them up again. This method is helpful if the machine experiences persistent errors or connectivity issues that a basic reset cannot resolve.
My Keurig Is Not Responding; Will a Reset Help?
If your Keurig is completely unresponsive, a reset can often fix the problem. Start by unplugging the machine for at least 30 seconds. Remove the water reservoir and K-Cup holder to ensure no blockages are affecting functionality.
After reconnecting and powering on, check if the display lights up and buttons respond. If the machine still does not respond, it could indicate a more serious internal issue requiring professional repair or contacting Keurig customer support.
Will Resetting My Keurig Affect Its Brewing Settings?
A basic reset generally does not affect your saved brewing settings or profiles, but a factory reset will erase all customized options. Profiles, strength, cup size preferences, and Wi-Fi settings will need to be reconfigured after a full reset.
You should only perform a factory reset when persistent errors, connectivity issues, or recurring error codes cannot be fixed with a basic reset. This ensures your personalized brewing preferences remain intact unless a full reset is necessary.
How Often Should I Reset My Keurig Coffee Maker?
You only need to reset your Keurig when it exhibits issues such as error codes, unresponsive buttons, slow brewing, or display malfunctions. Frequent resetting is not required for regular maintenance.
Regular cleaning, descaling, and proper usage reduce the need for resets. If you notice recurring problems even after a reset, it may indicate mechanical or electrical issues, in which case contacting Keurig support is advisable. Resetting should be a troubleshooting step, not a routine action.
Can a Reset Fix Slow Water Flow or Weak Coffee?
Yes, sometimes slow water flow or weak coffee is caused by internal system glitches that a reset can resolve. Start with a basic reset by unplugging the machine, waiting 30 seconds, and plugging it back in.
If the issue persists, check for blockages in the water reservoir, K-Cup holder, or needle. Performing a full descaling along with the reset can improve water flow and restore proper brewing strength, ensuring a better cup of coffee every time.
What Should I Do If My Keurig Still Shows Errors After a Reset?
If your Keurig continues to display error codes after performing both basic and factory resets, it may indicate a more serious mechanical or electrical problem. Check for obstructions, improperly seated components, or limescale buildup.
If the problem persists, contacting Keurig customer support is the next best step. They can guide you through advanced troubleshooting, repair options, or replacement if necessary. A reset fixes most minor issues, but persistent errors usually require professional intervention.
Final Thoughts
Maintaining a smooth-running Keurig ensures that every cup of coffee is consistent and satisfying. Minor glitches, unresponsive buttons, or error messages are common issues, but they don’t have to interrupt your routine. Understanding the proper steps and precautions prepares you to handle these problems efficiently, keeping your machine reliable and your coffee experience enjoyable.
Learning [How to Reset a Keurig Coffee Maker] empowers you to troubleshoot effectively and restore normal operation without unnecessary frustration. Whether performing a simple power reset, a factory reset on touchscreen models, or combining a descaling routine, these methods address most common issues. Regular attention to cleaning, water quality, and proper operation reduces the frequency of errors, extending the life of your machine.
By preparing your Keurig correctly, following step-by-step reset methods, and adopting preventive habits, you can ensure consistent performance and avoid interruptions. Mastering [How to Reset a Keurig Coffee Maker] helps you maintain your appliance, allowing you to enjoy every cup of coffee with confidence and convenience.