How Do You Make Coffee In A Keurig – Step-By-Step Guide
To make coffee in a Keurig, start by filling the water reservoir with fresh water and powering on the machine. Run a rinse cycle without a pod to clean the system.
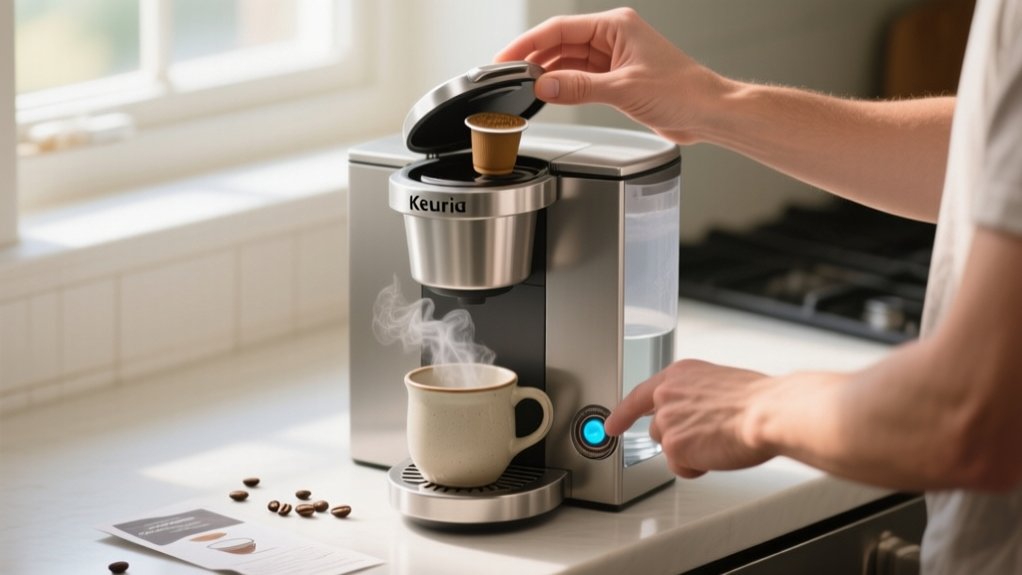
Lift the handle, insert your K-Cup or compatible pod with the lid facing down, then close firmly. Select your brew size and strength, using the Strong button if you want bolder flavor.
Press brew and wait for your perfect cup. Keep your machine well-maintained to enjoy consistent, delicious coffee every time. There’s more to explore for optimizing your brew.
How to Set Up Your Keurig for the First Time
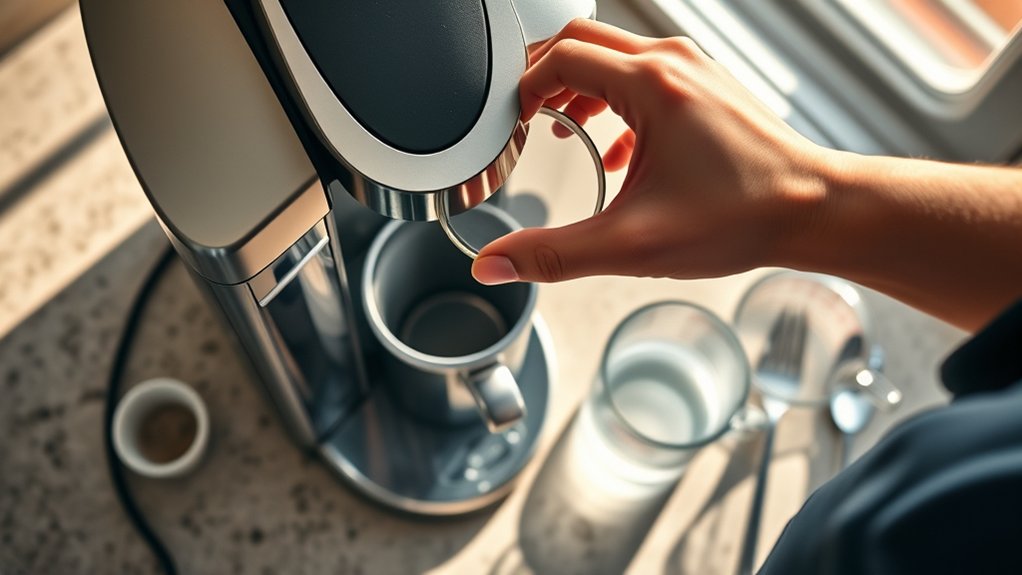
Before you brew your first cup, you’ll need to set up your Keurig properly to guarantee it works flawlessly.
Start by unboxing the Keurig and placing it on a flat, stable surface close to a power outlet.
Next, fill the water reservoir with fresh, filtered water, making sure to go above the minimum fill line.
Plug in the machine and power it on, then wait 2-3 minutes for it to heat up, ensuring ideal brewing temperature.
To prime the internal components, press the brew button without inserting a pod and run a cleansing cycle.
Finally, explore settings like brew temperature and auto-on features to customize your experience, setting the stage for perfectly brewed coffee every time.
Why You Should Rinse Your Keurig Before Brewing
You should rinse your Keurig before brewing because it helps get rid of leftover coffee oils that might make your coffee taste a bit off.
Plus, running a quick water cycle gets the brewing mechanism ready to go, so it works smoothly every time.
It’s a simple step that makes sure you get a cleaner, fresher cup of coffee with each use.
Remove Residual Coffee Oils
Start by running a quick rinse cycle on your Keurig to flush out residual coffee oils that can build up inside the machine.
These oils, if left unattended, can affect your coffee’s flavor, leading to unwanted bitterness over time.
Using a cleansing cycle with filtered water is key.
It not only helps remove residual coffee oils but also prevents mineral buildup, preserving the machine’s internal components.
Regularly performing this rinse, especially after periods of inactivity, keeps your Keurig clean and efficient.
This simple maintenance step primes the machine for each brew, ensuring your coffee tastes fresh and vibrant every time.
Prevent Off-Flavors
Although it may seem like a small step, rinsing your Keurig before brewing plays an essential role in preventing off-flavors from tainting your coffee. When you rinse, you flush out residual tastes and odors that can dull your brew’s flavor.
To maximize this benefit, here’s what rinsing does for you:
- Removes leftover coffee oils and stale water
- Primes internal components for a fresher flavor
- Prevents mineral buildup that causes clogging
- Enhances overall cleaner taste with every cup
- Takes less than a minute but greatly improves quality
Prime Brewing Mechanism
Because residual flavors and contaminants can linger inside your Keurig after periods of inactivity or before first use, running a cleansing cycle with just water is essential to prime the brewing mechanism.
This simple step flushes out any leftover residues, ensuring the cleanliness of the machine and preparing internal components for ideal brewing performance.
Using a large mug to catch the water, you’ll complete this rinse in under a minute, effectively preventing mineral buildup and stale tastes.
Regularly priming the brewing mechanism not only enhances the flavor of your coffee but also extends your Keurig’s lifespan by keeping its internal parts clean and functioning smoothly.
Don’t skip this quick rinse. It’s crucial for consistently great coffee every time you brew.
How to Insert a K-Cup or Cambio Roasters Pod
When you lift the brewer’s handle, you’ll reveal the pod chamber ready to accept either a K-Cup or a Cambio Roasters pod.
Here’s how to insert your pod correctly for a perfect cup of Keurig Coffee:
Verify your pod fits the pod holder; Cambio Roasters pods are compatible with all Keurig models.
Place the pod with the lid facing downward into the chamber.
Lower the handle firmly until it clicks, ensuring the pod is sealed inside.
Remember, Cambio Roasters pods use recyclable aluminum and contain premium Arabica beans for rich flavor.
Once inserted, press the brew button to start brewing fresh coffee immediately.
Following these steps guarantees your Keurig delivers a smooth, flavorful brew every time.
Choosing the Right Brew Size and Strength on Your Keurig
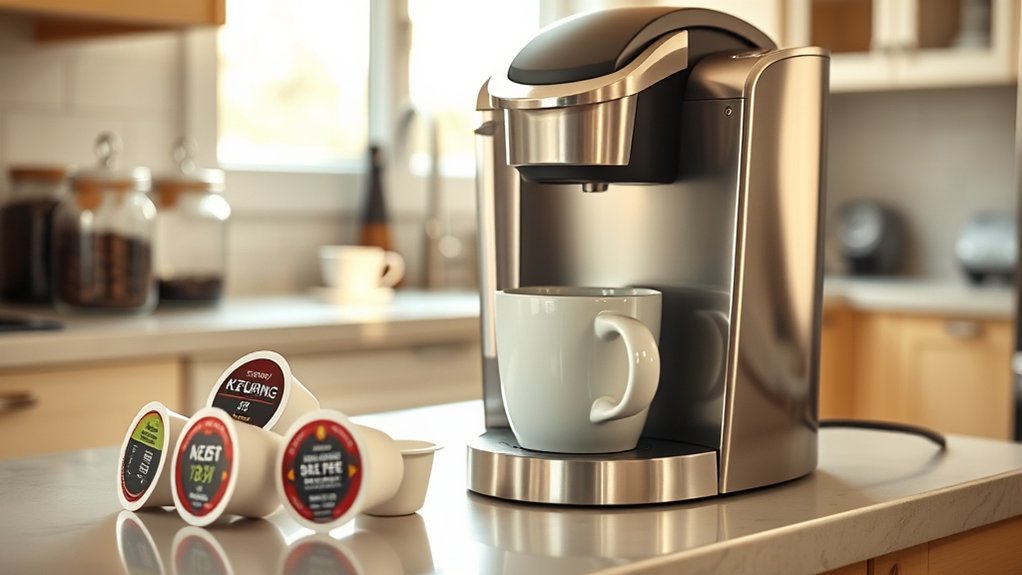
You have several brew size options on your Keurig, typically ranging from 6 to 12 ounces. This allows you to customize each cup to your taste.
For a bold flavor profile, 8 ounces is often ideal, especially with dark roasts, as smaller brew sizes prevent flavor dilution.
Avoid choosing larger sizes like 10 or 12 ounces when using a single pod since this can weaken the coffee’s strength.
If your machine has a Strong button, use it to enhance the extraction process, resulting in a richer, more intense cup.
Don’t hesitate to experiment with different brew sizes and strengths to discover the perfect balance that suits your preferences.
Mastering these settings guarantees every cup highlights your coffee’s unique flavor profile.
How to Brew Coffee With a Keurig
Mastering the brew size and strength sets the stage for creating a perfect cup with your Keurig.
To brew coffee with precision:
Fill the reservoir with fresh, filtered water above the minimum line to avoid mineral buildup and preserve flavor.
Insert a compatible K-Cup pod or a filled reusable pod firmly into the chamber.
Lower the handle to secure the pod.
Select your preferred brew size, keeping in mind that 8 ounces often delivers a bold, balanced taste.
Press the brew button to initiate the process; your coffee will be ready in under a minute.
This method guarantees a fresh coffee experience every time, combining convenience with quality to satisfy your daily caffeine needs.
How to Use Reusable Pods With Your Keurig
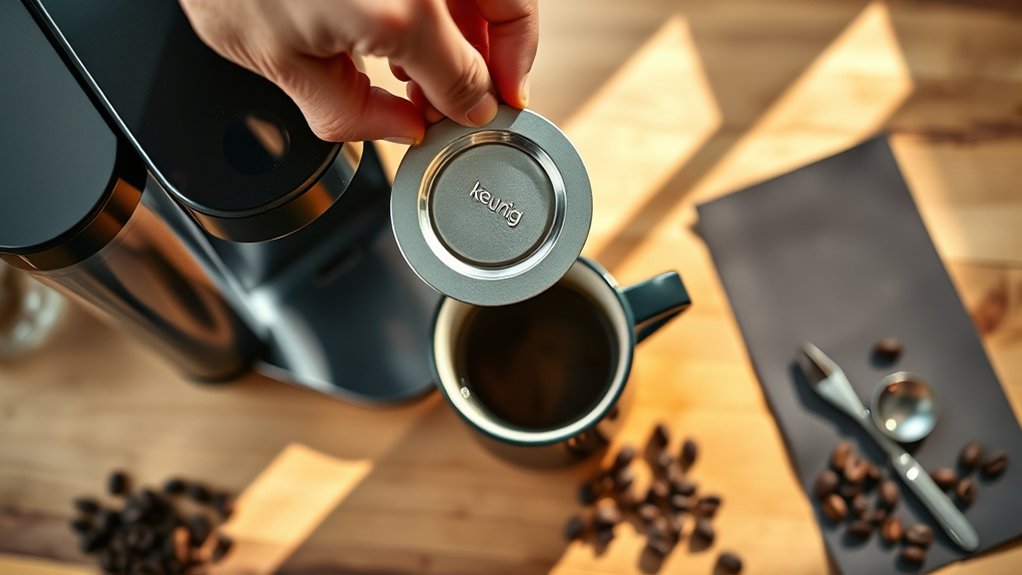
To get the best results with reusable pods, start by grinding your coffee beans to a medium consistency. You’ll want to measure about 9-12 grams per pod to get the right amount of coffee.
Next, adjust your Keurig settings by choosing a smaller cup size. If your machine has a Strong button, go ahead and use that to boost the flavor extraction—it really makes a difference.
And don’t forget, cleaning both the pod and your machine regularly is key. This helps guarantee consistent quality and keeps your coffee tasting great every time.
Preparing Reusable Pods
Using reusable pods with your Keurig offers a flexible and eco-friendly way to enjoy your favorite coffee blends.
To prepare your reusable pod correctly, follow these expert tips:
Grind coffee beans to a medium texture, about 9-12 grams (2-3 tablespoons), for the best extraction. Fill the reusable pod without overpacking to guarantee proper water flow during brewing.
Securely close the pod to prevent spills and maintain pressure. Insert the pod snugly into the machine’s compartment before lowering the handle.
Choose a smaller brew size (6-8 oz) to intensify flavor, and consider using the Strong button if your Keurig has one.
Brewing Settings Tips
Once your reusable pod is prepped and securely in place, fine-tuning your Keurig’s brewing settings can greatly enhance your coffee’s flavor and strength.
Choose a medium grind, similar to sea salt, and fill your reusable pod with 9-12 grams of coffee to avoid overpacking.
Select a smaller brew size, 6 to 8 ounces, to concentrate flavor. If your model has a Strong button, use it for bolder extraction.
Place your mug on the drip tray, then press the brew button to start.
This process mirrors using K-Cup pods but gives you control over grind and quantity.
Properly adjusting brew size and strength guarantees each cup delivers maximum taste and aroma from your reusable pod, elevating your Keurig experience every time.
Cleaning And Maintenance
Although brewing great coffee is essential, maintaining your Keurig and reusable pods is just as important for consistent flavor and machine longevity.
Prioritize cleanliness to avoid residue buildup that can alter taste. After each brew, rinse your reusable pod thoroughly to keep it clean and ready.
Follow these expert tips for ideal upkeep:
- Use a medium grind coffee (9-12 grams) to guarantee smooth water flow and flavor extraction.
- Rinse the reusable pod after every use to prevent clogging.
- Securely close the pod lid to avoid spills and guarantee proper brewing.
- Wash the water reservoir weekly with warm, soapy water to eliminate impurities.
- Descale your Keurig every 3-6 months with a descaling solution or white vinegar to prevent mineral buildup and maintain performance.
Consistent maintenance guarantees great coffee and a long-lasting machine.
How to Brew a Carafe With the Keurig K-Duo Plus
Brewing a full carafe with the Keurig K-Duo Plus takes just a few precise steps to deliver rich, flavorful coffee for your entire household or office.
Start by filling the water reservoir to the MAX fill line to guarantee enough water for the entire brew.
Next, add ground coffee to the filter basket. Use about one tablespoon per cup for peak taste.
Carefully reinsert the filter basket drawer and place the carafe securely on the warming plate.
Power on the machine, select the CARAFE option, and pick your desired brew size up to 12 cups.
For a bolder cup, press the STRONG button before starting.
This method guarantees a full pot of fresh, delicious coffee, perfect for busy mornings or gatherings.
How to Set Up Auto Brew on Your Keurig K-Duo Plus
If you want your coffee waiting for you right on schedule, setting up Auto Brew on your Keurig K-Duo Plus is straightforward and efficient.
Just follow these expert steps to guarantee your machine brews at your chosen time:
Fill the water reservoir to the MAX fill line for sufficient water.
Load the mesh filter with about 1 tablespoon of coffee grounds per cup.
Press the AUTO button to start the Auto Brew setup.
Use the H/M buttons to set the exact time, making sure to select AM or PM correctly.
Confirm your settings by pressing the blinking brew button to activate Auto Brew.
With these precise steps, your Keurig will deliver fresh coffee automatically, exactly when you want it.
Tips for Customizing Your Keurig Coffee Flavor and Strength
To boost your coffee’s flavor and strength, try selecting a smaller brew size—somewhere between 6 to 8 ounces. This helps concentrate the taste, making your cup more flavorful.
And if your Keurig has a strong brew setting, definitely give it a go! It extends the brew time, which pulls out more of those rich flavors.
With these simple tweaks, you get to have more control over how bold your coffee turns out every single time.
Adjust Brew Size
Choosing the right brew size on your Keurig can dramatically transform your coffee experience. When brewing coffee in the morning, adjusting the brew size lets you control flavor intensity and strength.
Here’s how to optimize it:
Select a brew size between 6 to 12 ounces; 8 ounces usually delivers a bold, balanced cup. Use smaller sizes with dark roasts to enhance richness and concentration.
Avoid brewing large volumes from a single pod to prevent dilution, especially when using a reusable K-cup.
Experiment with different sizes to find your ideal flavor-strength balance.
And don’t forget to keep your pod holder and water reservoir clean to maintain consistent brew quality.
Use Strong Setting
Adjusting your brew size sets the foundation for a great cup, but tapping into the Strong setting takes your Keurig coffee flavor to the next level. Use the strong button to boost flavor extraction, especially with dark roasts or specialty blends.
Pair this with smaller brew sizes, like 6 or 8 ounces, to concentrate the taste and avoid dilution. Experimenting with brew temperature can further enhance the aromatic oils released. Keep your machine and pods clean to maintain ideal brewing conditions.
| Brew Size (oz) | Effect on Flavor |
|---|---|
| 6 | Most concentrated, boldest |
| 8 | Robust, balanced strength |
| 10+ | Milder, less intense |
Use these tips to customize your perfect Keurig cup every time.
How to Clean and Maintain Your Keurig Regularly
Although your Keurig delivers convenience and great coffee, keeping it clean is essential to ensure it brews at its best. Regular maintenance prevents buildup and guarantees each cup tastes fresh. Just follow these expert steps:
Keeping your Keurig clean is key to fresh, flavorful coffee every time.
Wipe down the exterior daily and rinse reusable pods to avoid residue buildup.
Weekly, wash the water reservoir with warm, soapy water and clean the pod holder thoroughly.
Every 3 to 6 months, descale your machine using a descaling solution or white vinegar to remove mineral deposits.
Also, check the water reservoir and pod holder regularly for clogs or blockages that could affect performance.
After cleaning, make sure all parts are completely dry before reassembling to prevent mold and odors.
Sticking to this routine preserves your Keurig’s longevity and coffee quality.
Troubleshooting Common Keurig Brewing Issues
Keeping your Keurig clean sets the stage for smooth brewing, but even well-maintained machines can encounter issues.
If your Keurig® machine won’t brew, first verify the ground coffee holder is fully pushed in and the water reservoir is filled correctly.
When coffee temperature feels off, run a cup of hot water through before pressing the brew button to warm the heating element.
If the machine pauses mid-brew, wait about 20 seconds. It usually resumes, preventing overflow.
Coffee not passing through the K-cup often signals a clog or improperly closed lid.
Check the pod holder carefully.
Finally, descale your Keurig® machine every 3-6 months to keep mineral buildup from affecting performance.
These troubleshooting steps keep your brewing consistent and your coffee delicious.
Tips for Brewing the Best Coffee Every Time
When you want the richest flavor from your Keurig, start by using filtered water to reduce mineral buildup and enhance taste. This simple step sets the foundation to brew the perfect cup every time.
To maximize flavor and consistency, keep these tips in mind:
- Use filtered water to prevent scale and preserve your machine’s performance.
- Choose a brew size between 6 to 8 ounces for ideal extraction, especially with dark roasts.
- Press the “Strong” button if available to intensify flavor and richness.
- Clean the water reservoir and pod holder regularly to avoid residue buildup.
- Brew immediately after using freshly brewed coffee pods or freshly ground beans to capture oils and aroma.
Following these practices guarantees every cup is consistently fresh and flavorful.
Frequently Asked Questions
Can I Use Flavored Syrups With My Keurig Coffee?
Yes, you can definitely use flavored syrup options with your Keurig coffee to elevate your brew.
Popular best brands like Torani and Monin offer a variety of flavors such as vanilla and caramel.
For the best results, try mixing techniques like adding syrup directly to your mug before or after brewing, or blending it with milk or cream for a richer taste.
Start with a tablespoon and adjust to find your perfect flavor balance.
How Long Does It Take to Brew One Cup of Coffee?
Your brewing speed depends largely on the water temperature and cup size you select.
Once the Keurig heats the water, usually within 2 to 3 minutes, the actual brew time for one cup takes about 30 to 60 seconds.
Smaller cup sizes brew faster, while larger ones might take a bit longer.
This efficient process guarantees your coffee reaches ideal extraction temperature quickly, letting you enjoy a fresh cup almost immediately.
Are Keurig Machines Energy Efficient?
Yes, Keurig machines are energy efficient thanks to their energy saving features like auto-off and Energy Saving mode, which cut power during inactivity.
You’ll appreciate how their brewing modes only heat water when needed, reducing waste.
By adopting these eco friendly practices, you’ll minimize energy consumption without sacrificing convenience.
Can I Use My Keurig for Tea or Hot Chocolate?
Like a Swiss Army knife of your kitchen, your Keurig can brew more than just coffee. You can easily enjoy tea by choosing tea-specific pods and using tea brewing tips like selecting an 8 oz size or hitting the “Strong” button for bolder flavor.
For hot chocolate options, pick cocoa-sweetened pods made for Keurig.
Experiment with beverage customization ideas to tailor strength and sweetness, but remember to clean your machine regularly to keep flavors pure.
What Types of Water Are Best for Keurig Brewing?
You should use filtered water for your Keurig to enjoy the best flavor and avoid mineral buildup. Filtered water removes impurities and chlorine that affect taste.
Mineral content effects are important. Too few minerals, like in distilled water, can make your coffee taste flat. Natural minerals, on the other hand, enhance flavor.
Also, water temperature importance can’t be overstated. Using water that reaches around 192°F guarantees ideal extraction and a rich, balanced brew.
Conclusion
Now that you’ve mastered your Keurig, you’re basically a coffee wizard brewing liquid gold with a simple pod snap! Imagine never facing a bitter cup again, just perfect, customized coffee every single time.
With your Keurig set up, rinsed, and dialed to your favorite strength, you’re ready to conquer mornings like a pro. Keep it clean, troubleshoot like a champ, and savor the unbeatable convenience that turns every sip into pure magic.